Vermillion Insights
March 20, 2026 · Ken Vermeille · 16 min read
Recurring Billing With Stripe a Guide for Subscription Apps
Master recurring billing with Stripe. This guide covers everything from setup and server logic to webhooks and churn reduction for subscription apps.
If you're building a subscription app, setting up recurring billing is one of the first, most critical hurdles you'll face. It's the engine of your business, and getting it wrong can be catastrophic. The process boils down to using a platform like Stripe Billing to define your products and prices, writing the server-side code to manage subscriptions, and then using webhooks to keep your app synced up with what’s happening on the payment side.
Why Stripe Is the Engine for Modern Subscription Apps
I've seen countless apps in the $10K to $500K MRR range get completely bogged down by a clunky or homegrown billing system. Building your own recurring payment logic is a classic money pit. It's a massive engineering drain that pulls your team away from what really matters: making your product better. This is exactly where Stripe stops being a "nice to have" and becomes a core strategic tool.

Stripe isn’t just another way to take credit cards. It’s the entire infrastructure for managing the messy, brutal realities of recurring revenue that can absolutely derail a growing app.
Offload Complex Billing Logic
Just think about what it takes to build this stuff from scratch. The engineering meetings, the edge cases, the bugs.
- Prorations: What happens when a user upgrades or downgrades in the middle of a billing cycle? The math gets complicated fast.
- Failed Payments: Your system needs logic to retry charges at just the right times to maximize recovery.
- Global Tax: Handling VAT and sales tax across dozens of countries is a full-time job in itself.
- Secure Card Updates: You have to provide a PCI-compliant way for users to update their cards without the data ever touching your servers.
Stripe handles all of this. Its APIs and pre-built tools, like the customer portal, let your team sidestep months of work and focus on building features users actually want. For a deeper look at the fundamentals, this is a solid guide on how to set up recurring payments that scale your SaaS.
A Battle-Tested Platform for Scale
Stripe’s infrastructure is built for insane volume. It’s the plumbing for a huge chunk of the internet’s subscription economy. We're talking over 500 million API requests daily and the ability to handle 25 million subscription renewals for a single business in one day, all with 99.999% historical uptime.
That level of reliability is non-negotiable for the kind of companies Vermillion works with - apps hitting that crucial $10K to $500K MRR mark, often using tools like RevenueCat, Superwall, or Adapty.
Choosing the right technology from the start prevents painful migrations later. Stripe, combined with a dedicated subscription management layer, creates a resilient foundation that supports rapid growth and experimentation without accruing technical debt.
This is especially true for mobile-first apps. We frequently see founders pair Stripe with a platform like RevenueCat. In that stack, Stripe is the core payment engine, while RevenueCat handles the nightmarish complexity of in-app purchases on iOS and Android. It’s a perfect example of how choosing the right subscription management platforms can dramatically speed up your entire roadmap.
Structuring Your Products and Prices in Stripe
I’ve seen more teams create a future engineering nightmare in the Stripe Dashboard than almost anywhere else. Getting your products and prices wrong from the start feels like a small mistake. It’s not.
It’s a decision that will lock you into a structure that can take months of painful engineering work to unwind later. This isn't just about plugging in a "Pro Plan" for $9.99. It's about building a foundation for recurring billing with Stripe that doesn't crumble the second you want to run a new pricing experiment.
Products vs. Prices: The Relationship That Matters
In Stripe’s model, a Product is the thing your customer buys. A Price is how they buy it - the amount, the currency, and how often they're billed.
The key is that one Product can have many Prices. This is where so many people trip up.
Practical Example: Let's say you have a fitness app with a "Premium Membership" Product. Instead of creating separate products for each plan, you'd attach multiple prices to that single "Premium Membership" Product:
- Price 1: $19.99 billed monthly (
price_1M4a...) - Price 2: $199.99 billed annually (
price_1M4b...) (a classic discount to lock in revenue) - Price 3: $19.99 billed monthly, but configured with a 14-day free trial (
price_1M4c...)
This one-to-many relationship keeps your Stripe account from becoming a junkyard of duplicate products like "Premium Monthly," "Premium Yearly," and "Premium Trial." It makes your analytics cleaner and your life easier. It’s a small bit of discipline that pays huge dividends.
Choosing the Right Pricing Model
Stripe Billing offers a few different models, but for most subscription apps, you’re really deciding between a handful of core strategies. The model you pick should be a direct reflection of how your customers get value from your app.
| Pricing Model | Best For | Practical Example |
|---|---|---|
| Flat Rate | Simplicity and predictability. Perfect when the main value is just getting access. | A meditation app charging a single, fixed monthly fee (`$9.99/mo`) for its entire library of content. |
| Per-Unit (or Per-Seat) | Apps where value grows with usage or users. This is the bread and butter of B2B SaaS. | A project management tool like Asana that charges $10.99 per user, per month. |
| Tiered | Segmenting your user base with different feature sets (e.g., Basic, Pro, Business). | A design tool like Figma with a free tier for basic features, a 'Pro' tier for power users, and a 'Team' tier for collaboration. |
For most apps selling directly to consumers, a mix of Flat Rate and Tiered pricing is the way to go. You create your tiers as separate Products ("Pro Plan," "Premium Plan") and then attach your flat-rate monthly and annual Prices to each one.
A Practical Example: Fitness App Tiers
Let’s walk through setting up two subscription tiers for our imaginary fitness app, "FitTrack," using this exact approach for recurring billing with Stripe.
Product 1: FitTrack Pro
This is the standard paid plan. You’d log into your Stripe Dashboard and create a new Product literally named "FitTrack Pro."
Product 2: FitTrack Premium
This is the top-tier plan, maybe it includes live coaching sessions. You’d create a second Product named "FitTrack Premium."
Simple enough. Now for the prices. For the FitTrack Pro Product, you’ll create two Prices:
- Monthly Price: $9.99/month, recurring.
- Annual Price: $99.99/year, recurring.
Then, you do the same thing for the FitTrack Premium Product, but with its own pricing, like $29.99/month and $299.99/year. This setup is clean, easy to manage on the backend, and gives you the flexibility to add new prices (like a "Founding Members" discount) later without messing up your whole system.
Pro Tip: Use the metadata field on Stripe Products and Prices. This is an absolute game-changer. You can attach your own app-specific data directly to the Stripe object, like feature_access: ["basic_workouts", "nutrition_tracker"]. When a user subscribes, your server can read this metadata and know exactly which features to enable. I've seen teams build entire, brittle database tables just to map Stripe plans to app permissions because they skipped this. Don't make that mistake.Building Your Server-Side Subscription Logic
Once you’ve got your products and prices set up in the Stripe Dashboard, it’s time to build the real engine. This is your backend server, the part that actually talks to the Stripe API to create and manage subscriptions.
From my experience, this server-side logic is where 90% of security gaps and race conditions are born. It's the most critical piece of the puzzle.
The entire checkout flow has to be orchestrated by your server, not the client. Your frontend’s only job is to collect payment details inside a secure Stripe Elements Iframe and pass the resulting PaymentMethod ID to your server. Your backend handles the rest, making sure no sensitive data ever even grazes your client-side code.
The Core Subscription Creation Flow
Getting the server-side API calls in the right sequence is everything. A misstep here leads to a clunky user experience at best, and a security hole at worst. Let's walk through the essential steps, using a common Node.js and Express.js pattern.
First things first, you need to create a Stripe Customer. This object is your user's anchor inside Stripe's world, holding all their payment methods and subscriptions.
// Actionable Example: Creating a Stripe Customer on your server
app.post('/create-customer', async (req, res) => {
  const { email, name } = req.body; // Data from your app's signup form

  try {
    const customer = await stripe.customers.create({
      email: email,
      name: name,
      // Add a reference back to your internal user ID for easy lookups
      metadata: { appUserId: req.user.id }
    });
    // Securely save the customer.id to your User model in your database
    await User.update({ stripeCustomerId: customer.id }, { where: { id: req.user.id } });
    res.json({ customerId: customer.id });
  } catch (error) {
    res.status(400).send({ error: { message: error.message } });
  }
});
This is non-negotiable: you absolutely must save the returned customer.id in your own database, linked to your user's record. That ID is the permanent bridge between your app's user and their Stripe profile.
The infographic below shows how the pieces you defined earlier fit into the flow your server will execute.
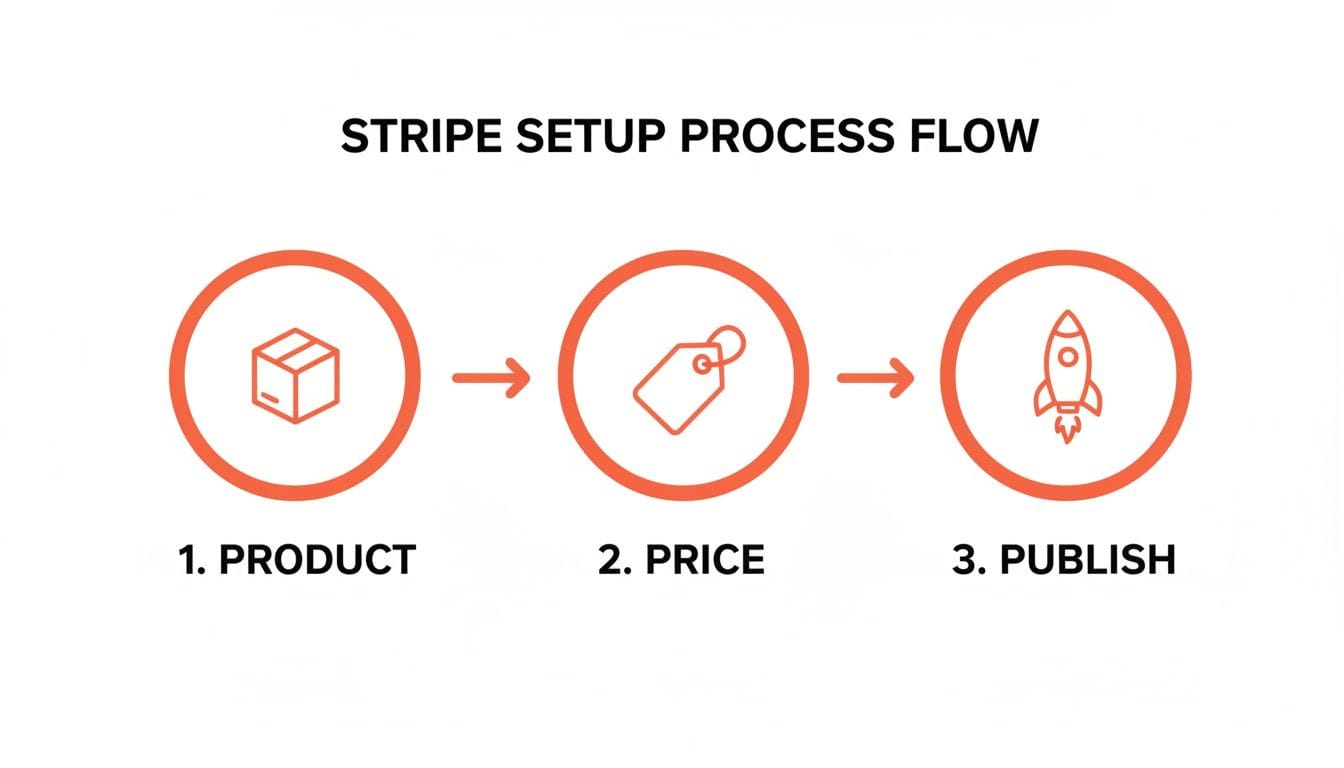
Defining the Product and Price upfront means your server just has to reference their IDs, which keeps the subscription creation logic clean and simple.
Creating the Subscription and Handling Payment
With a Customer ID from your database and a PaymentMethod ID from the client, your server is ready to create the actual subscription. This one API call brings it all together - the customer, their card, and the plan they chose.
But here’s where things get interesting. The API call might not succeed right away. Strong Customer Authentication (SCA) regulations might require an extra step from the user, like a 3D Secure pop-up, leaving the subscription in an incomplete state. Your server logic has to be ready for that.
A classic mistake is assuming a successful API response means the subscription isactive. Always check the subscription'sstatusfield. If it'sincomplete, your job is to return theclient_secretof the PaymentIntent back to the frontend so it can handle the next step.
Here’s a simplified endpoint for creating the subscription on your server:
// Actionable Example: Creating the subscription on your server
app.post('/create-subscription', async (req, res) => {
  const { customerId, priceId, paymentMethodId } = req.body;

  try {
    // 1. Attach the payment method to the customer
    await stripe.paymentMethods.attach(paymentMethodId, {
      customer: customerId,
    });

    // 2. Set it as the default payment method for future invoices
    await stripe.customers.update(customerId, {
      invoice_settings: { default_payment_method: paymentMethodId },
    });

    // 3. Create the subscription
    const subscription = await stripe.subscriptions.create({
      customer: customerId,
      items: [{ price: priceId }],
      payment_behavior: 'default_incomplete', // Explicitly handle SCA
      expand: ['latest_invoice.payment_intent'], // IMPORTANT!
    });

    res.json(subscription);
  } catch (error) {
    res.status(400).send({ error: { message: error.message } });
  }
});
See that expand parameter? That's a pro-level technique. It tells Stripe to include the full payment_intent object in the response, saving you an extra API call and giving your frontend everything it needs to handle payment confirmations right away.
Embracing Idempotency
Let's be real: networks glitch and users love to double-click buttons. A solid system for recurring billing with Stripe must handle duplicate requests without creating duplicate customers or subscriptions. This is where idempotency becomes your best friend.
Stripe’s APIs have built-in support for idempotency keys. These are just unique strings you generate on your server and send with each API request. If Stripe gets a request with a key it’s already seen, it won’t perform the action again; it just sends back the original result.
Actionable Insight: The best place to generate an idempotency key is on your front-end before the user clicks "Subscribe". Pass this unique key to your backend. This way, if the user double-clicks and sends two identical requests, both will have the same idempotency key, preventing a double charge.
// Practical Example: Using an idempotency key in a Stripe API call
const { idempotencyKey } = req.body; // Sent from your client

const subscription = await stripe.subscriptions.create({
  customer: customerId,
  items: [{ price: priceId }],
  // ... other params
}, {
  idempotencyKey: idempotencyKey, // Pass the key here
});
Building this logic in from day one will save you from a world of support tickets and prevent accidental double-billing. Honestly, managing these kinds of complexities is a core challenge, which is why many teams ultimately turn to dedicated subscription management platforms that build on top of Stripe's foundation.
Mastering Webhooks for Real-Time Subscription Updates
If your server-side code is the engine that creates subscriptions, then webhooks are the real-time nervous system that keeps your app in sync with reality. Without them, your database quickly starts telling lies about who has access and who doesn't. You're effectively flying blind after that initial API call.

Think of it this way: a webhook is just an automated message (an HTTP request) that Stripe sends to your server whenever something important happens. A subscription renews. A payment fails. A user cancels. Stripe tells you instantly. This isn't optional; it's non-negotiable for any serious implementation of recurring billing with Stripe.
Setting Up Your Webhook Endpoint
First things first, you need to create a dedicated API endpoint on your server that's ready to catch these notifications from Stripe. This is just a standard route in your backend framework (like Express.js) that accepts POST requests.
You’ll then paste this endpoint's URL into your Stripe Dashboard settings, and Stripe will start sending event data to it. Here’s where a shocking number of developers get it wrong, and it’s a dangerous mistake.
You have to verify that these incoming requests are actually from Stripe. A malicious actor could easily send fake webhook events to your endpoint, trying to trick your system into granting free premium access or causing chaos.
Thankfully, Stripe makes this simple. It includes a unique signature in the header of every single webhook request. Your endpoint’s very first job is to use your webhook "signing secret" (found in the Stripe Dashboard) to verify that signature. If it doesn't match, you reject the request, no questions asked.
Listening for Essential Subscription Events
You don’t need to process every event Stripe can send - that would be overwhelming. Just focus on the events that directly impact user access and your business logic. For a typical subscription app, a handful of events are mission-critical:
- `invoice.payment_succeeded`: This is your green light. When this event hits, you know a recurring payment went through. Your code should update the user's
current_period_endin your database to reflect the new expiration date, ensuring their access continues without a hitch. - `invoice.payment_failed`: This is your red flag. The renewal payment failed. This is your cue to change the user's status to something like "past_due" and start your dunning process - like triggering in-app messages to ask them to update their card.
- `customer.subscription.deleted`: The subscription is officially canceled. When you get this, you must update your database to revoke premium access at the end of the current billing cycle.
- `customer.subscription.updated`: This one is a catch-all for changes like upgrades, downgrades, or when a trial converts to a paid plan. Your handler needs to inspect the data payload to see what changed and update the user's plan in your system accordingly.
As your app grows, the volume of these real-time events can become a firehose. For more advanced data processing, many teams start looking into programmatic ingestion pipelines. Solutions that focus on connecting a webhook source to Kafka, for example, allow you to build more sophisticated and scalable event-driven architectures.
Building an Idempotent Webhook Handler
Here’s a fact of life with webhooks: you're going to get duplicates. Network hiccups, timeouts - all sorts of things can cause Stripe to resend an event if it doesn't get a success response from your server fast enough.
If your code isn't ready for this, you're in for a world of hurt. Imagine a payment_succeeded event shows up twice and your code happily gives the user two months of credit for a single payment. That’s why your webhook handler absolutely must be idempotent.
Idempotency just means that processing the same event multiple times produces the exact same result as processing it once. A rock-solid, common strategy is to log the ID of every event you successfully process.
Actionable Example:
- When a webhook arrives, grab its unique
idand check it against a list of processed event IDs you're storing, maybe in your database or a cache like Redis. - If you find the ID, you've already handled this one. Simply send a
200 OKsuccess response back to Stripe and stop. - If the ID is new, go ahead and run your business logic (e.g., update the user's access). Once it's done, save the event
idto your log and then send the200 OKresponse.
This simple check prevents duplicate actions and makes your entire billing system far more resilient. Failing to build idempotent handlers is one of the most common - and painful - mistakes I see teams make. It's a foundational practice for a system you can actually trust.
Automating Revenue Recovery and Reducing Churn
Failed payments are a silent killer of your monthly recurring revenue. Involuntary churn - the kind caused by an expired card or insufficient funds - can feel like an unavoidable cost of doing business. But leaving that money on the table is a massive, unforced error.
This is where you shift from just processing payments to actively recovering them. With a few clicks in Stripe, you can set up powerful automation that does the work for you.
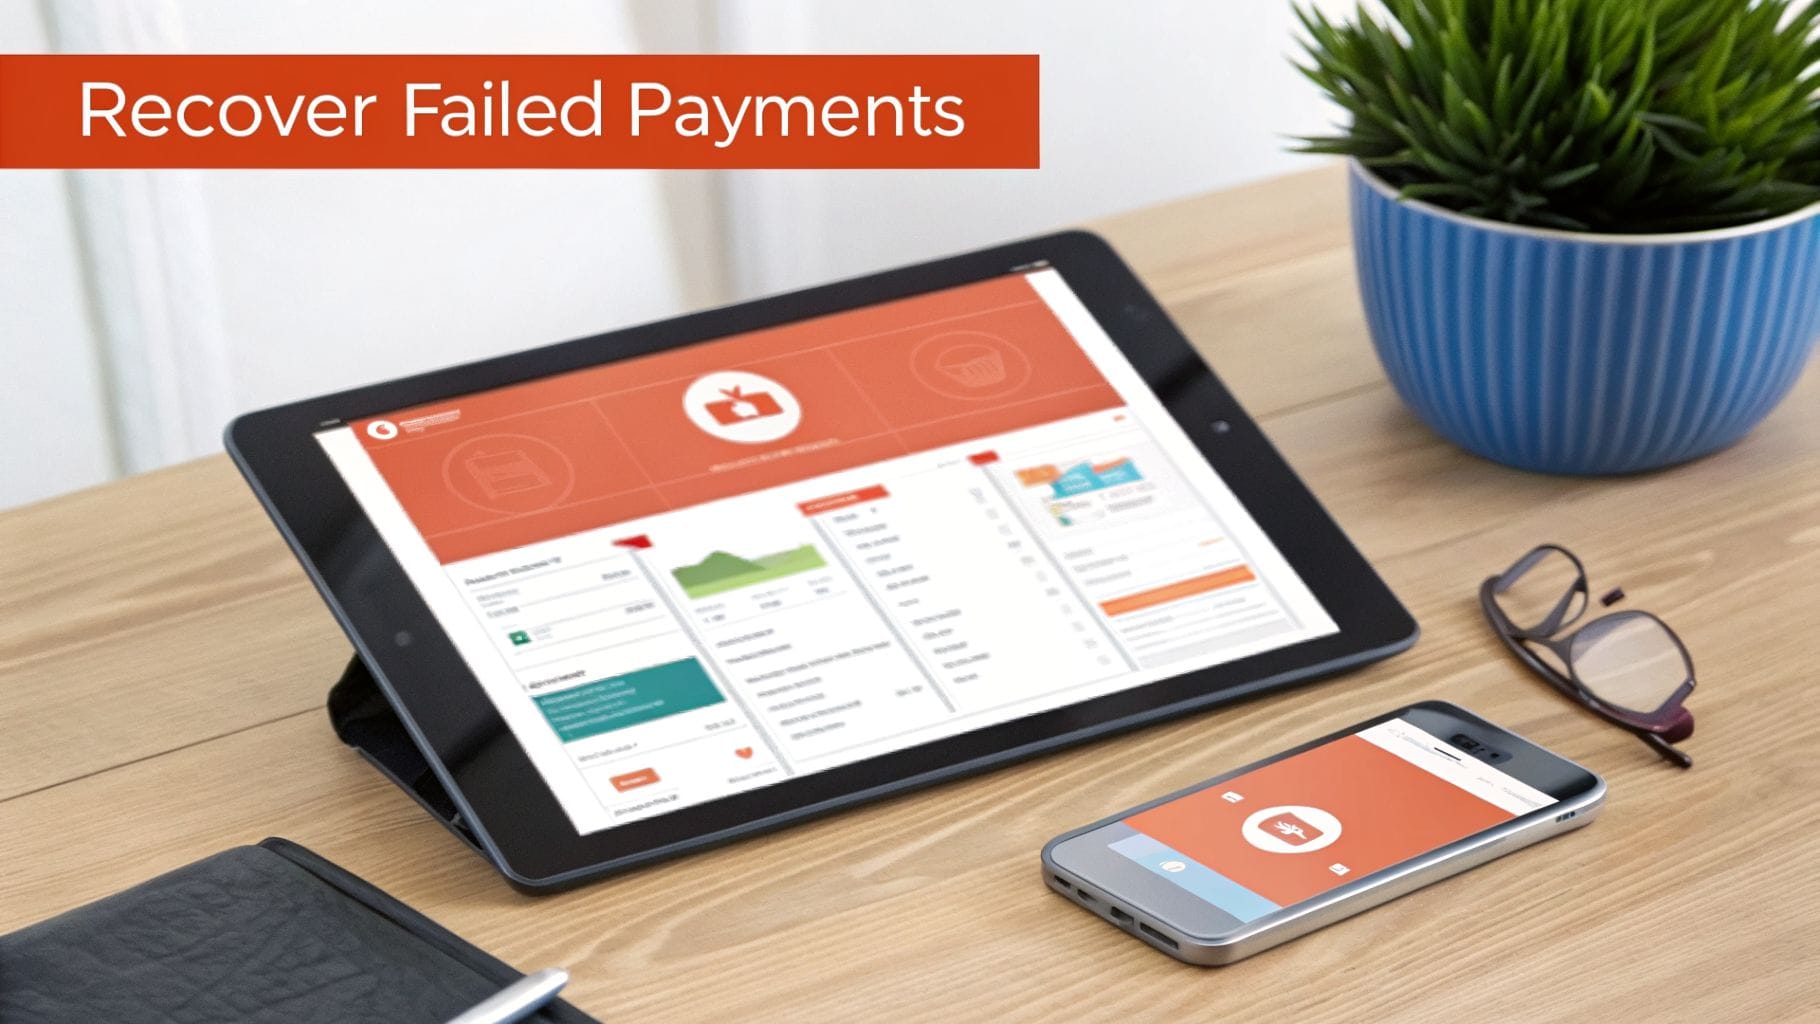
Don't mistake this for a minor technical task; it's a critical business function. I’ve seen subscription apps spend a few hours configuring these settings and directly recover thousands in lost MRR. The return on that time is enormous.
The reality is that nearly 25% of all subscription churn comes from these involuntary payment failures. But the good news? Stripe’s recovery tools can claw back an impressive 56% of that lost revenue on average, all thanks to a suite of automated features designed to fight churn without you lifting a finger.
Activate Smart Retries
If you do only one thing, make it this: enable Smart Retries. This isn’t your typical, naive retry logic that just re-attempts a failed charge every 24 hours. Honestly, that old method is clumsy and can even get your account flagged by payment processors for racking up declines.
Instead, Smart Retries uses machine learning, analyzing data from the entire Stripe network to figure out the perfect time to try again. It knows, for example, that retrying a card from a specific bank on a Friday morning has a much higher success rate. This AI-powered approach recovers 9% more revenue than old-school fixed retry schedules.
Actionable Insight: Activating this is literally a one-click process. Head to your Stripe Dashboard, go to Settings > Billing > Subscriptions and emails, find the "Manage failed payments" section, and just turn on "Retry failed payments." It's the highest-ROI click you'll make all month.
Configure Your Dunning Process
Dunning is just the formal name for chasing down customers about failed payments. Stripe lets you automate this with a series of emails, and you should absolutely be using them. A simple, well-timed email reminding a customer their card is about to expire or that a payment just failed is often all it takes to stop churn in its tracks.
You can configure these automated emails in the same settings area. My go-to recommendation is a simple, friendly sequence:
- Proactive Email: Send one email 7 days before the card on file is set to expire. This is purely proactive and surprisingly effective. The subject line can be simple: "Your card on file for [App Name] is about to expire."
- Reactive Emails: After a failed payment, set up a short series of emails - for instance, at 1 day, 3 days, and 5 days after the failure. Keep the tone helpful, not accusatory. "Uh oh, your payment failed for [App Name]."
Keep the email copy simple and direct. The goal is to get the customer to a page where they can update their payment method with zero friction. Thankfully, Stripe handles that for you.
Use the Hosted Invoice Page
Your dunning emails can link directly to a Stripe-hosted page where the customer can securely update their card details and pay the overdue invoice. This is a complete game-changer.
It requires zero developer work on your end, is fully PCI compliant, and automatically reflects your branding. This single feature removes the massive engineering lift of building and securing an "update card" form yourself.
When you combine Smart Retries with automated dunning emails that link to this hosted page, you create a powerful, self-healing system for your recurring billing with Stripe. For a deeper look at other churn-fighting strategies, check out our guide on how to reduce customer churn.
Frequently Asked Questions About Stripe Recurring Billing
Once you’ve got the core Stripe implementation live, the real work begins. That's when the tricky "what-if" questions pop up from the team - the edge cases that can make or break your user experience.
Here are the most common questions I get from app teams finalizing their Stripe setup. The answers are direct, practical, and tailored for mobile subscription apps.
How Do You Handle Refunds and Prorations?
Getting refunds and prorations right is all about customer trust. Mess it up, and you’ll burn users. Thankfully, Stripe handles most of the complexity.
When a user upgrades or downgrades their plan mid-cycle, you just need to update their subscription with the new Price ID. Stripe takes care of the math automatically. By default, it credits the user for any unused time on their old plan and rolls that credit into the first invoice on the new plan.
You can get more granular if you need to. The proration_behavior parameter in your API call gives you full control. You can disable proration entirely or even create an immediate invoice for the difference.
Practical Example: A user is on your $10/month 'Basic' plan. Exactly halfway through the month (e.g., day 15 of 30), they upgrade to the $25/month 'Pro' plan. Stripe will automatically credit them the $5 they didn't use on the Basic plan. Their immediate charge for the Pro plan will be just $20 (the $25 cost minus that $5 credit), and their new billing cycle starts that day.
For straight-up refunds, use the stripe.refunds.create API call and pass in the payment_intent ID from the original transaction. Simple as that.
Can Customers Pay With Methods Other Than Cards?
Yes, and you absolutely should let them. Limiting payments to just credit and debit cards is a surefire way to cap your global growth.
Stripe Billing supports a huge range of payment methods, including bank debits like ACH (US) and SEPA (Europe), plus popular digital wallets like Apple Pay and Google Pay. The first step is just flipping them on in your Stripe Dashboard under Settings > Payment methods.
Actionable Insight: Once enabled, these methods will show up automatically in a modern Stripe Checkout or Payment Element integration. For a mobile app, enabling Apple Pay and Google Pay is a no-brainer - it offers a one-tap checkout experience that dramatically increases conversion rates, especially for impulse subscriptions.
What Is the Best Way to Manage Free Trials?
Handling free trials is a fundamental part of recurring billing with Stripe. Don't overcomplicate it. The best practice is to create the subscription the moment a user signs up for the trial, but include the trial_period_days parameter.
This approach is better for a few key reasons:
- It validates the user's payment method upfront, reducing future payment failures.
- The subscription automatically flips from
trialingtoactivewhen the trial ends. Stripe handles the first charge without you needing to do a thing. - You'll get the
customer.subscription.trial_will_endwebhook a few days before the trial expires. This is your cue to send a reminder email so users aren't caught by surprise.
Actionable Insight: Use the trial_will_end webhook to do more than just send an email. You can also trigger an in-app message: "Your free trial of Pro ends in 3 days! Get ready to unlock [Feature X]." This reinforces the value they're about to pay for and reduces "surprise charge" cancellations.
At Vermillion, we are an embedded React Native engineering partner that helps subscription app teams doing $10K–$500K in MRR ship faster. If you're bottlenecked by engineering and need a dedicated team that lives in your codebase, let's talk about accelerating your roadmap. Learn more at https://vermillion.agency.
Keep reading
See all →
March 22, 2026
Unlocking Revenue Your Guide to Price Tier Strategy
March 21, 2026
Your Guide to Flawless Stripe Subscription Management

May 14, 2026
Fractional Mobile Engineering vs. Full-Time Hiring in 2026
The mobile engineering talent market has shifted dramatically over the past two years. Budgets are tighter, AI tools have changed what a sin...

March 19, 2026
Unlocking Growth with Mobile App Retention Metrics
Discover the mobile app retention metrics that directly fuel MRR growth. This founder's guide offers actionable strategies to track, analyze...

March 18, 2026
How to Launch an App in 2026 A Startup Playbook
Learn how to launch an app with our complete playbook for subscription startups. Covers MVP development, app store release, analytics, and g...