Vermillion Insights
March 22, 2026 · Ken Vermeille · 19 min read
Unlocking Revenue Your Guide to Price Tier Strategy
Master your app's price tier strategy. Learn to build, price, and test tiers that boost LTV and drive sustainable growth with our step-by-step guide.
A price tier strategy is how you offer different versions of your product at different prices. Each version, or tier, comes with its own set of features or usage limits. Think of it like a coffee shop menu with small, medium, and large options - it’s about giving every customer the right-sized solution for their needs and budget. This isn't just about putting a price tag on your app; it's a core part of a smart growth model.
Why a Price Tier Strategy Is Your App's Growth Engine
A tiered pricing model does more than just collect money. It turns your pricing into an active tool for growth. Instead of a single, one-size-fits-all price that’s too expensive for some and too cheap for others, you create a structured path that works for everyone. For a subscription app founder, this is the difference between a simple paywall and a sophisticated system that drives user acquisition and maximizes revenue.
This approach is powerful because it recognizes that your user base isn't a monolith. A new user just poking around your app has totally different needs than a professional who relies on it every single day. A single price point forces you to pick one group over the other, and you'll inevitably leave money on the table.
To build an effective strategy, it's helpful to break it down into its core components. These pillars work together to align your pricing with both user value and your business goals.
Here’s a simple breakdown:
Key Pillars of an Effective Price Tier Strategy
| Pillar | What It Means | Example for a Meditation App |
|---|---|---|
| Value Metric | The core unit of value your customers pay for. It should grow as their usage grows. | *Minutes of guided meditation* or *number of meditation courses completed*. |
| Segmentation | Dividing your users into groups based on their needs, behavior, or willingness to pay. | Beginners (need basic timers), Regulars (want guided courses), Experts (desire advanced analytics). |
| Tier Architecture | How you structure your tiers - either by adding more features or allowing more usage. | A Free tier with 5 meditations, a Pro tier with unlimited access, and a Plus tier with offline mode. |
| Price Anchoring | Using a higher-priced tier to make other tiers seem more reasonable in comparison. | A $19.99/mo "Mindfulness Coach" tier makes the $9.99/mo "Pro" tier look like a great deal. |
These pillars aren't just theoretical. They form the practical foundation for a pricing model that can adapt and grow with your user base, turning casual users into paying customers and paying customers into long-term advocates.
Cater to Every User Segment
A well-designed set of price tiers lets you segment your audience naturally. You can build an accessible entry-level tier for the curious and price-sensitive, a solid middle tier for the bulk of your customers, and a premium tier for the power users who want it all.
- Casual Users: A free or low-cost tier with basic features is perfect for casting a wide net. It lets people experience your app's core value without a big commitment. Example: A language-learning app offers a free tier that allows users to complete the first lesson of every course. This gives them a taste of the content without giving everything away.
- Growing Professionals: A "Pro" or "Standard" tier hits the sweet spot on features and price. This usually becomes the go-to choice for users who are starting to depend on your app. Example: The same app's "Pro" tier unlocks unlimited access to all lessons and grammar guides for a monthly fee.
- Power Users & Teams: A "Premium" or "Business" tier unlocks your app's full potential, catering to those who need every single feature and are happy to pay for it. Example: Its "Premium" tier adds AI-powered conversation practice and personalized feedback reports, targeting serious learners.
By meeting customers where they are, you don't just increase conversions. You build the foundation for a long-term relationship. This model understands that a user's needs will grow, and it gives them a clear path to follow inside your app.
Create Clear Upgrade Paths and Boost Revenue
One of the biggest wins from a tiered strategy is how it naturally encourages upgrades. As a user gets more value from your app, they’ll eventually hit a feature or usage limit. At that point, moving to a higher tier feels like a logical and necessary next step, creating organic upsells without any aggressive sales tactics.
To really get why this matters, it helps to see how it fits into the broader SaaS business model, where predictable revenue and customer retention are everything. Smart tiers directly fuel both.
For instance, a project management app might offer a free tier for up to three projects. Once a user starts juggling more than that, upgrading to the "Pro" tier for unlimited projects isn't a hard sell - it's a no-brainer. This self-selection process is a key driver of sustainable revenue, turning your product's own utility into your best salesperson.
Alright, you've figured out who you're selling to. Now comes the million-dollar question: what are you actually selling them, and for how much? This is where you architect your pricing tiers, and it's one of the most critical parts of your entire strategy.
You're essentially building the shelves in your store. Get it right, and customers can easily find what they need and happily pay for it. Get it wrong, and you'll confuse everyone, leaving money on the table.
There are two classic ways to build these shelves: gating by features or by usage. Let's break down what that actually means.
The Feature-Based Model: The Toolbox Approach
The feature-based model is the most straightforward. You simply tie each pricing tier to a specific set of tools. Higher tiers unlock more powerful or specialized features.
Think of it like a toolbox.
- The Basic Plan: Gets you a hammer and a screwdriver. Enough for simple, everyday tasks.
- The Pro Plan: Adds a power drill, a full socket wrench set, and a level. Now you can tackle serious projects.
This works so well because the value is dead simple to understand. Users can see exactly what they're missing. A designer using Canva's free plan who wants to remove a background from an image will run headfirst into a paywall for their "Magic Eraser" tool. The decision to upgrade is immediate and tied to a specific pain point.
This model is a fantastic fit if your app has very distinct "jobs to be done" that naturally align with different types of users - from casual dabblers to stone-cold professionals.
The Usage-Based Model: The "Pay-as-You-Grow" Approach
Instead of locking away features, a usage-based model gives most people access to the same tools but puts a cap on how much they can use them. You're not selling a bigger toolbox; you're selling a bigger workshop.
Your price is tied directly to a value metric - the core thing your customers get value from.
Common value metrics are things like:
- Number of contacts in a CRM
- Gigabytes of storage used
- Number of team members
- API calls made per month
Mailchimp is the classic example. Their tiers are almost entirely built around the number of contacts you have and the number of emails you send. As your newsletter grows, you naturally slide into a higher tier. It’s a beautiful, low-friction model because your cost is directly tied to your success. When you win, they win.
Getting this right means deeply understanding how your segments, their needs, and your features all tie together to justify a price.
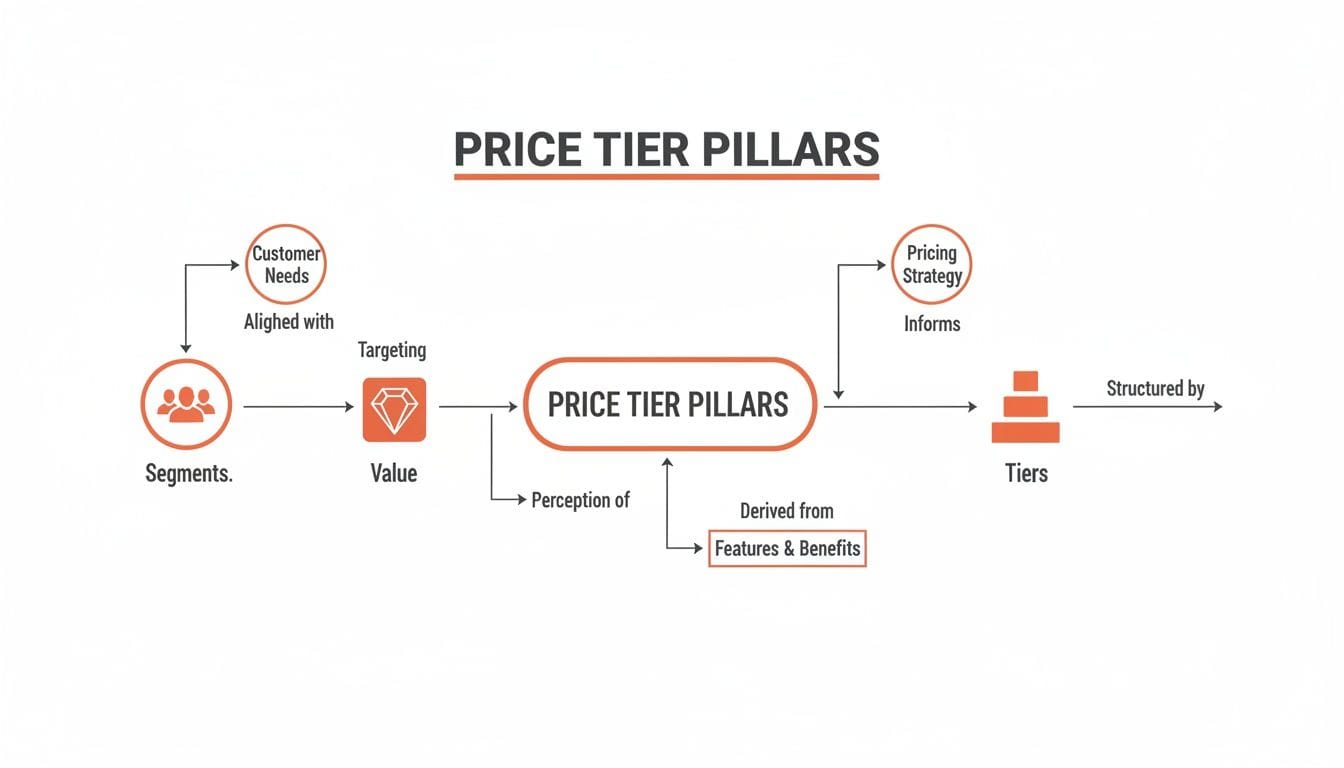
As you can see, it all starts with the customer. Once you know who they are and what they need, you can build the value, package it into features, and wrap it all up in tiers that make sense.
The Hybrid Model: The Best of Both Worlds
Here's the thing: you don't have to pick just one.
The most successful apps often blend both models. They use a hybrid approach to create multiple, compelling reasons for users to upgrade, capturing value from all corners of the market.
Imagine a video editing app:
- Basic Plan: You get the standard editing tools, but exports are capped at 720p (feature-based) and you can only create 3 projects per month (usage-based).
- Pro Plan: You unlock 4K exports and advanced color grading tools (feature-based), plus you get unlimited projects (usage-based).
With this setup, you've created two different upgrade triggers. A user might upgrade because they desperately need that 4K export for a client, or they might upgrade simply because they hit their project limit. Either way, you've guided them to the checkout.
This is a common strategy for subscription membership sites, which constantly have to balance giving away enough value to hook users without giving away the whole farm.
A well-designed hybrid model is a revenue-generating machine. We've seen well-structured tiers increase overall revenue by 20-30% simply by creating clearer upgrade paths. For example, just by placing a $19.99/month Pro tier between a $9.99 Basic and a $49.99 Premium plan, we’ve seen mid-tier adoption jump by 35% due to price anchoring.
Ultimately, designing your tiers comes down to one question: "What is the one thing that will make my user need to upgrade?"
Is it a killer feature they can't work without? Or will they inevitably hit a usage ceiling as their own work scales? Nail that, and your pricing will practically sell itself. For a more detailed breakdown, you can check out this tier pricing example where we go even deeper.
Setting Prices with Psychology and Unit Economics

Alright, you’ve mapped out your tiers. Now for the hard part: putting a price tag on them. This is where the art of pricing meets the science. Get it right, and you guide users to the perfect plan. Get it wrong, and you leave money on the table - or worse, drive customers away.
This isn’t about picking numbers out of a hat. It's a blend of smart psychology and cold, hard math.
Influencing Decisions with Price Anchoring
People rarely know what something should cost. We look for clues. That’s where price anchoring comes in.
When a user sees a "Premium" tier for $49.99/month, the "Pro" tier at $19.99/month suddenly feels like a steal. That was probably your target price all along, but the higher-priced anchor just made the decision a whole lot easier.
The most expensive tier isn’t always designed to sell. Its main job is often to make your other tiers look more reasonable.
Your most expensive tier isn't just for power users; it's a strategic tool. Its primary job is often to make your most popular tier look like the best value on the page, guiding customers exactly where you want them to go.
Another classic psychological lever is the annual discount. Displaying a clear callout like "Save 20% with yearly billing" is non-negotiable for a subscription app. It does two amazing things for your business:
- Improved Cash Flow: You get paid for a full year upfront. That’s a huge win for any company, especially a growing one.
- Reduced Churn: Users who commit to a year are locked in. They aren't making a monthly rent-or-cancel decision. I’ve seen this simple trick dramatically improve retention rates time and again.
You’re not just offering a discount; you’re framing the annual plan as the smart financial choice.
Grounding Your Prices in Unit Economics
While psychology helps frame the perception of your price, unit economics makes sure your business actually survives. You can have the most persuasive pricing page in the world, but if the numbers don't work, you're just accelerating your own demise.
You absolutely have to know these two numbers:
- Customer Acquisition Cost (CAC): The average amount you spend to get one new paying customer.
- Lifetime Value (LTV): The total revenue you expect to generate from a single customer before they churn.
For a subscription app to be healthy, your LTV must be significantly higher than your CAC. The gold standard most investors look for is an LTV to CAC ratio of 3:1 or better. If you spend $50 to acquire a customer, they need to bring in at least $150 in revenue over their lifetime.
This is why truly understanding the relationship between customer acquisition cost vs lifetime value is non-negotiable. Your prices have to be high enough to pay back your CAC and turn a profit.
Price Based on Value, Not Just Costs
Finally, the most durable pricing strategies are built on value-based pricing. Don't price based on your costs. Don't just copy your competitors. Price based on the value you deliver.
If your app saves a small business 10 hours of manual work each month - work that costs them $500 in staff time - then a $50/month subscription is an absolute no-brainer for them.
When you can clearly show that the value a customer gets is multiples of what they pay, you can price with confidence.
Combine these three elements - psychological framing, solid unit economics, and a value-first mindset - and you’ll have a pricing structure that doesn’t just convert, but builds a profitable business for the long haul.
Engineering Your Price Tiers for Rapid Growth

A clever pricing strategy is just a theory until your engineers bring it to life. Without a solid technical backbone, your brilliant pricing plans are stuck on a slide deck, gathering digital dust. The goal is to build a system that lets you be nimble - to test, iterate, and roll out pricing changes in weeks, not quarters.
This is where your pricing model meets the metal. A well-engineered system untangles pricing logic from the core application code, which is the secret to rapid-fire adjustments. This technical agility is what allows your product and marketing teams to move at the speed of the market, not at the mercy of the next app release cycle.
Integrating with Subscription Management Platforms
Trying to manually manage subscription states, entitlements, and cross-platform purchases is a recipe for disaster. I've seen teams burn months on this. This is why subscription management platforms like RevenueCat, Superwall, or Adapty are absolutely non-negotiable for any serious subscription app.
Think of these tools as the central nervous system for your revenue. They act as a single source of truth for a user's subscription status, handling all the messy interactions with the App Store and Google Play behind the scenes. They normalize the data and give your app a simple, reliable way to check a user's access level.
By plugging in one of these platforms, you can:
- Centralize Entitlements: Instantly know if a user should have access to "Pro" or "Premium" features, no matter where they originally subscribed.
- Run Experiments Seamlessly: These platforms are built for A/B testing. You can remotely configure different paywalls and offers for specific user segments without ever shipping a new app build.
- Simplify Analytics: Get clean, reliable data on your most important metrics - MRR, churn, and LTV - without building your own complex data pipeline from scratch.
For founders who need to move fast, this is a massive force multiplier. It abstracts away a huge amount of engineering complexity, letting you focus on building features your users love, not billing infrastructure. If you're weighing your options, our guide on choosing the right subscription billing software can help you cut through the noise.
Building Flexible and Remotely Configurable Paywalls
Your paywall should never be hardcoded into your app. The most effective teams treat their paywalls as dynamic, remotely configurable canvases. This means a product manager can launch a pricing experiment without ever having to file an engineering ticket.
This is usually done using a remote configuration tool (like Firebase Remote Config) or the built-in capabilities of a paywall-specific platform like Superwall.
Here’s what that looks like in practice:
- Define Paywall Components: Your app’s code is built to render a paywall from a simple JSON configuration. This JSON defines everything: the headline, the feature bullets for each tier, the prices, and the call-to-action text.
- Host the Configuration: This JSON file lives on a server, not buried inside your app's code.
- Fetch and Render: When a user hits the paywall, the app simply fetches the latest configuration from the server and renders it on the fly.
This setup empowers your team to test different headlines, feature lists, and even prices in real-time. You could run an A/B test comparing a $9.99/month price point against a $12.99/month one for new users and have conclusive results in a matter of days.
Handling Price Changes with Grandfathering
So, you’ve run your experiments and decided to increase the price of your Pro plan. Great! But what about the thousands of loyal users already paying for that plan?
The answer is grandfathering.
Grandfathering is the practice of allowing existing customers to keep their original pricing plan, even after you've introduced new, higher prices for new customers. This is the single most important tactic for keeping trust and preventing mass churn during a price change.
Trying to force-migrate your entire user base to a new, higher price is the fastest way to earn a flood of one-star reviews and angry support tickets. It's a breach of trust. Instead, you honor the price they signed up at. Subscription management platforms like RevenueCat handle the logic for this automatically, making it painless to implement.
When you roll out the new pricing, the messaging should celebrate your existing users' loyalty. Frame it as, "New pricing for new customers," while reassuring your current subscribers that their plan and price are safe. This turns a potentially negative event into a moment that reinforces their smart decision to subscribe to your app early on.
Testing and Iterating Your Price Tier Strategy
Getting your first pricing page live feels like a finish line, but it’s not. It’s the starting line. Your pricing isn't a static document you can set and forget; it's a living part of your product that needs constant attention.
The real growth happens when you stop guessing and start treating your pricing as a loop of continuous optimization. You build a repeatable process for running experiments, test your assumptions, and let real user behavior guide your next move.
This approach ensures your pricing evolves right alongside your product, your customers, and the market itself.
Designing Your First Pricing Experiment
For most apps, a great first experiment is to test the fundamental structure of your tiers. Let's say you're currently running a simple two-tier model (Free and Pro). You have a hunch that a three-tier setup (Basic, Pro, Premium) might perform better. Here's how you'd design an A/B test for new users to find out.
- Formulate a Hypothesis: Your hypothesis isn't just a guess; it's a specific, testable statement. For example: "Introducing a three-tier structure will increase Average Revenue Per User (ARPU) by anchoring more users to a mid-range 'Pro' plan, compared to the current two-tier model."
- Create Two Variants:
- Variant A (The Control): This is your baseline. New users see your existing paywall with the Free and Pro tiers.
- Variant B (The Test): This is your challenger. New users see a new paywall with Basic, Pro, and Premium tiers. The features and price points are strategically chosen to test your hypothesis.
- Define Key Metrics: To pick a winner, you need to track the right numbers. Don't fall into the trap of looking at just one metric - a successful pricing strategy moves several needles at once.
- Conversion Rate: Simple enough. What percentage of users in each group buys a plan?
- Average Revenue Per User (ARPU): This one is critical. Does the three-tier model actually make you more money per user, even if the overall conversion rate dips slightly?
- Plan Distribution: In Variant B, which plans are people actually choosing? If everyone picks "Basic," your hypothesis might be wrong, even if ARPU goes up.
This structured approach is how you move from guessing to knowing. It gives you the hard evidence you need to guide your strategy forward.
Tracking the Right Metrics for Your Price Tier Strategy
A successful test isn’t just about which variant gets more clicks. Picking a winner based solely on the initial conversion rate can be a huge mistake. You need the full picture of user behavior and the downstream business impact.
Beyond those initial metrics, you need to be watching these numbers closely:
- Trial-to-Paid Conversion Rate: For apps with free trials, what percentage of users from each variant actually becomes a paying customer after the trial ends?
- Time to Conversion: Does one paywall design get users to pull out their credit card faster than the other?
- Churn Rate: This is the big one. After 30 or 60 days, do customers from one variant stick around longer? A higher initial ARPU means nothing if those users churn out in the first month.
Effective price tier testing is about finding the model that attracts the right customers - those who see the value, stick around for the long haul, and ultimately drive a higher Lifetime Value (LTV).
Running and Communicating Your Experiments
To get results you can trust, you have to run your test long enough to reach statistical significance. This just means you need a large enough sample size (enough users seeing each variant) to be confident the outcome wasn't just random luck. Tools like RevenueCat or Adapty often have built-in calculators to help you figure out how long to run your test.
There’s a reason tiered pricing has become so foundational. Recent data shows that over 60% of top apps use hybrid models with multiple tiers to effectively target different types of users. The "rule of three" (e.g., Basic, Standard, Premium) is popular because it works - too many choices can overwhelm people and crush your conversion rates. You can learn more about these subscription pricing strategies and their impact.
Once your experiment gives you a clear winner and you decide to roll out a change, communication is everything. For new users, it's easy - they simply see the new pricing.
But for your existing, loyal users, the rule is simple: always grandfather them into their current plan. Honoring the price they originally signed up for builds enormous trust. Forcing them onto a new, more expensive plan is one of the fastest ways to create a backlash and destroy the reputation you've worked so hard to build.
Even after you've mapped out the perfect pricing strategy, the real questions hit when you're in the trenches trying to implement it. You’re not alone. We’ve guided dozens of founders through this, and the same handful of operational questions always surface.
Let’s tackle them head-on.
How Many Price Tiers Should My App Have?
For most subscription apps, three tiers is the answer. Don't overthink it. This "Good, Better, Best" model isn't just popular; it’s effective because it leans on proven psychology like price anchoring.
The structure is designed to make your middle "Better" option look like the most sensible choice. It's usually the sweet spot where you deliver significant value and capture the most profit.
What about the other options?
- Two Tiers (e.g., Basic & Pro): This can work, but it’s risky. You’re forcing users into a binary choice with no middle ground. It can feel like an "all or nothing" decision, which often leads to users choosing "nothing." It also completely misses the anchoring effect that a third tier provides.
- Four or More Tiers: Unless you're serving distinct enterprise clients who need custom contracts and dedicated support, avoid this. Adding more tiers almost always leads to decision paralysis. A confused mind says no.
Start with three. It provides a solid framework for segmenting your users without overwhelming them. Only add or remove tiers if you have hard data from A/B tests or deep user research that proves another structure is better for your specific audience.
How Do I Change Prices for Existing Subscribers?
This is the most sensitive operation in subscription management. There is only one rule that matters: always grandfather them in.
Grandfathering means letting your loyal, early customers keep the price they originally signed up for, even while new users pay more. Anything else is a violation of their trust and a guaranteed recipe for a churn spike, a support nightmare, and a storm of 1-star reviews.
Trying to force a price hike on your existing user base is one of the fastest ways to burn the goodwill you’ve worked so hard to build. Thankfully, tools like RevenueCat are built to handle grandfathering logic automatically, so the technical lift is minimal.
When you make the announcement, the messaging is everything.
Frame it as a reward for loyalty. Your early supporters are locked in at their special price as a thank you. The new pricing is for future customers and reflects all the new value you’ve added since they first joined.
This approach flips a potentially negative event into a powerful retention tool that reinforces your commitment to your most valuable customers.
What Are the Biggest Tiered Pricing Mistakes to Avoid?
A bad pricing strategy is worse than no strategy at all. We see founders make the same handful of mistakes over and over. Watch out for these.
- The Overly Generous Free Tier: Your free plan should be a tantalizing preview, not the full movie. If it's too powerful, users have zero incentive to ever pull out their credit card. They need to feel the pain of what they're missing. Actionable Insight: Cap usage or gate a "must-have" feature. For a note-taking app, maybe the free tier can only sync across two devices.
- The Overly Stingy Free Tier: The opposite is just as bad. If the free plan is so crippled that users can't experience that "aha!" moment, they'll churn before they ever understand your app's true value. Give them just enough to get hooked. Actionable Insight: Ensure your free tier allows a user to complete one full "job." If it's a photo editor, they must be able to edit and save at least one photo.
- Hoarding All Value in the Top Tier: It's tempting to put every shiny new feature in your most expensive plan. This is a classic blunder. It devalues your mid-tier - where most of your paying users live - and makes them feel like they're being left behind. Actionable Insight: When you launch a new feature, consider adding it to your mid-tier for a limited time to reward existing subscribers and drive new upgrades.
- Confusing Price Gaps: The price jump between tiers sends a strong signal about the value jump. Gaps that are too small ($5 vs. $7) make the upgrade feel pointless. Gaps that are too large ($10 vs. $100) make it feel impossible. A good rule of thumb is to make each tier 1.5x to 2x the price of the one before it.
How Often Should I Revisit My Pricing Strategy?
Pricing isn't a "set it and forget it" task. Your pricing should be a living, breathing part of your product that evolves over time. Plan on a formal review of your entire price tier strategy at least once or twice a year.
But a calendar reminder isn't enough. Certain events should trigger an immediate pricing review.
Look for these triggers:
- You Ship a Major New Feature: When you add a significant amount of new value, your pricing should reflect it. Example: When Adobe added its generative AI "Firefly" to Photoshop, it created a new level of value that could justify a price adjustment or new tier.
- The Market Shifts: A new competitor shows up, or an existing one makes a big pricing change. You need to re-evaluate where you stand. Actionable Insight: Don't just copy them. Analyze if their change creates an opportunity for you to reposition yourself as the premium option or the better value.
- Your Metrics Go Sideways: If you see a sudden spike in churn, a dip in upgrade conversion, or your ARPU starts to flatline, it's a massive red flag that your pricing is no longer resonating.
Treat pricing as a constant process of optimization. Use A/B testing to validate any big changes before rolling them out to everyone. This iterative approach ensures your pricing remains a powerful growth engine, not a dusty relic from your launch day.
Building and iterating on a price tier strategy requires not just marketing insight but also engineering agility. At Vermillion, we provide embedded React Native engineering for subscription apps, helping you ship paywall experiments, onboarding flows, and new features weekly. If your growth is bottlenecked by engineering, let's talk about how we can help you move faster.
Keep reading
See all →
March 21, 2026
Your Guide to Flawless Stripe Subscription Management
March 20, 2026
Recurring Billing With Stripe a Guide for Subscription Apps

May 14, 2026
Fractional Mobile Engineering vs. Full-Time Hiring in 2026
The mobile engineering talent market has shifted dramatically over the past two years. Budgets are tighter, AI tools have changed what a sin...
March 19, 2026
Unlocking Growth with Mobile App Retention Metrics
Discover the mobile app retention metrics that directly fuel MRR growth. This founder's guide offers actionable strategies to track, analyze...
March 18, 2026
How to Launch an App in 2026 A Startup Playbook
Learn how to launch an app with our complete playbook for subscription startups. Covers MVP development, app store release, analytics, and g...