Vermillion Insights
March 18, 2026 · Ken Vermeille · 20 min read
How to Launch an App in 2026 A Startup Playbook
Learn how to launch an app with our complete playbook for subscription startups. Covers MVP development, app store release, analytics, and growth strategies.
Learning how to launch an app isn't about following a generic checklist. It's a focused mission that typically spans 10–20 weeks, moving from a raw idea to a polished product that solves a real problem for a specific group of people.
Your App Launch Roadmap from Idea to Initial Traction
Forget the checklists you’ve seen before. Most are just to-do lists. This is a battle-tested playbook for founders, especially those building subscription apps, who need a realistic path from concept to launch and beyond.
We’ll break down the entire journey, from validating your idea before writing a single line of code to navigating the app stores and using data to find your first paying users. The goal isn’t a perfect launch; it's a continuous cycle of building, measuring, and learning.
It all starts with knowing who you're building for. If you haven't nailed this down, everything else will be a struggle. Take the time to learn how to identify your target audience with real, actionable experiments.
This roadmap visualizes the core stages, showing how each phase builds on the last.
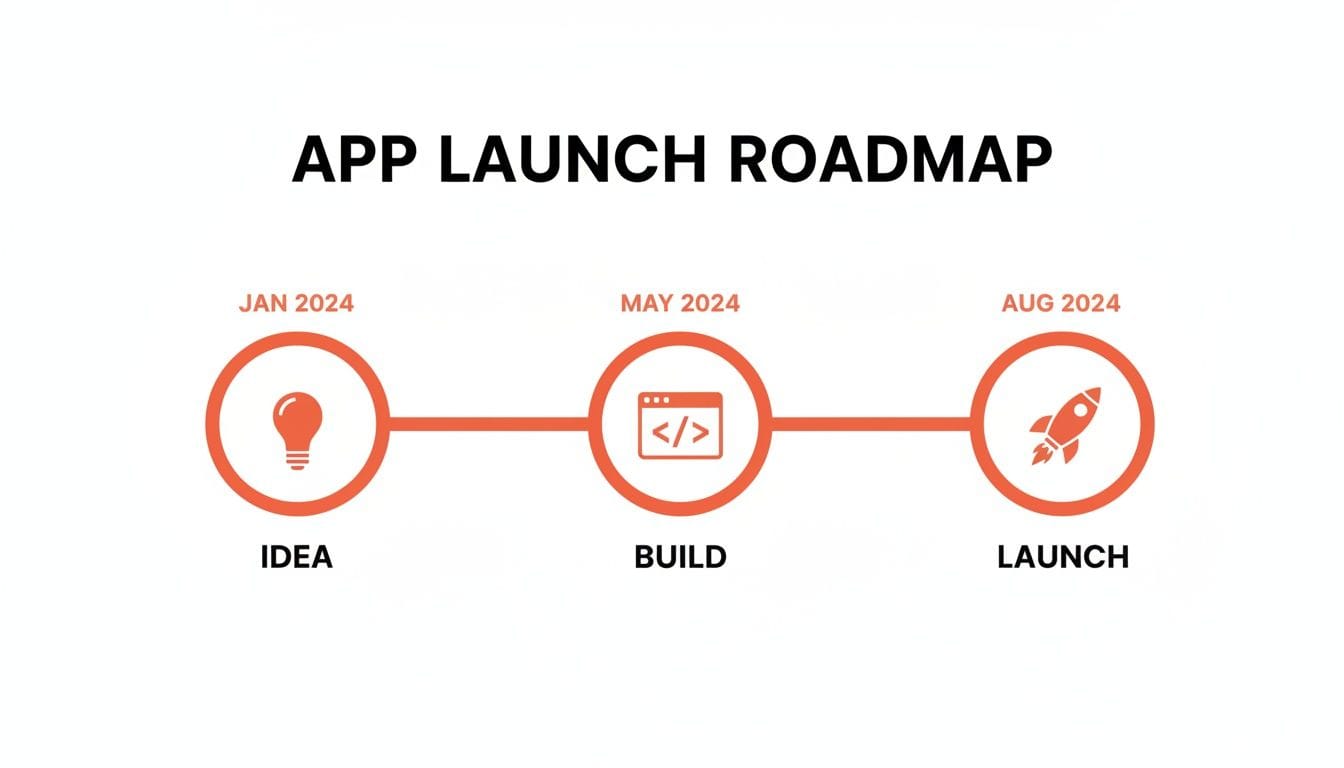
It’s a structured, forward-moving process that keeps the focus where it needs to be: on making progress.
The Opportunity Is Real, But Crowded
Let's be clear: the mobile app market is massive. In 2025 alone, mobile apps are projected to generate over $935 billion in revenue - a staggering 52% increase from 2023. For subscription-based startups, the opportunity is even bigger. For the first time, revenue from non-game apps is set to outpace games, showing that users are more willing than ever to pay for valuable experiences.
But this growth also means the market is incredibly crowded. A good idea isn't enough. You need a solid plan.
Your launch isn't the finish line; it's the starting pistol. The real work begins when you start gathering user feedback and iterating based on real-world data. Success isn't about a perfect launch, but about the speed at which you learn and improve.
The 10–20 Week Launch Timeline
Here’s a high-level look at the key phases you’ll move through. While every project is different, this timeline gives you a realistic framework for planning your launch.
10–20 Week App Launch Timeline Overview
| Phase | Key Activities | Estimated Duration (Weeks) |
|---|---|---|
| Validation & Strategy | Customer interviews, competitor analysis, defining the core problem, user journey mapping. | 1–2 Weeks |
| MVP Development | Building core features, UI/UX design, payment integration (e.g., [RevenueCat](https://www.revenuecat.com/)), basic backend setup. | 6–10 Weeks |
| Pre-Launch & Release | Beta testing, app store submission, creating marketing materials, setting up analytics. | 2–4 Weeks |
| Launch & Optimization | Go-live, monitoring KPIs (DAU, Churn, LTV), user feedback collection, A/B testing. | Ongoing |
This structure ensures you're building something people actually want, not just what you think they want. Now, let’s break down what actually happens in each phase.
Phase 1: Validation and Strategy (1–2 Weeks)
This is the most critical and often-skipped phase. Before you even think about code, your only job is to de-risk the idea. Don't build anything yet.
Instead, you should be:
- Interviewing potential customers: Get on the phone with at least 15–20 people in your target demographic. Understand their pain points. For example, if you're building a meal-planning app, don't ask "Would you use a meal-planning app?" Ask, "Tell me about the last time you tried to plan your meals for the week. What was the most frustrating part?" This uncovers real problems.
- Analyzing competitors: What are they doing right? More importantly, what are they doing wrong? A practical way to do this is to read their 1- and 2-star app store reviews. These are gold mines of user frustration and feature gaps you can exploit.
- Defining the core problem: Your goal is to find a problem so painful that people are already trying to solve it with clumsy workarounds - and would gladly pay for a better solution. For instance, are they using a messy combination of Google Sheets, a notes app, and screenshots to track their workouts? That's a strong signal a dedicated solution is needed.
You exit this phase with a clear "yes" or "no" on whether the problem is real and worth solving.
Phase 2: MVP Development (6–10 Weeks)
With a validated idea, it's time to build a Minimum Viable Product (MVP). The key word here is minimum. You’re not building your dream app; you’re building the most streamlined version that solves the core problem you identified.
For a subscription app, an MVP usually includes:
- The one or two key features that deliver immediate value. For a language-learning app, this might be the first set of interactive vocabulary lessons and a simple quiz feature, nothing more.
- A simple, functional user interface. Focus on clarity and ease of use, not award-winning design. Use standard UI elements that users already understand.
- A basic onboarding flow. A few screens that explain the core benefit and guide the user to their first "aha!" moment.
- A paywall to test price sensitivity and willingness to pay. Even if it's not perfectly polished, you need to see if users will actually pull out their credit card.
The goal isn't to build a perfect product. It's to ship a functional one to your first users as quickly as possible.
Phase 3: Launch and Iteration (Ongoing)
This is where the real learning begins. The launch phase isn't just about hitting "publish" in the app stores. It's a cycle of releasing, measuring, and iterating.
This phase includes:
- App Store Submission: Navigating Apple and Google's review processes. A practical tip: submit a build for review before you finalize your launch marketing. This gives you a buffer in case of rejection, so a review delay doesn't derail your entire launch plan.
- Marketing Your Launch: Reaching out to your initial waitlist, posting on relevant communities (like a subreddit for your target audience), and getting the word out to your first 100 users.
- Collecting Data: This is everything. Using analytics tools like Mixpanel or Amplitude, you’ll track where users drop off, which features they love, and what convinces them to subscribe. For example, you might discover that users who use your "search" feature within the first session are 3x more likely to subscribe. That's a powerful insight.
From here on out, your roadmap is driven by data. You’ll form hypotheses, run experiments, and continuously refine the app based on real user behavior, not assumptions.
Building Your Minimum Viable Product with React Native
Let's get one thing straight: your Minimum Viable Product (MVP) isn't just a half-baked version of your final app. It's the most direct path to discovering what your users actually care about. For startups, choosing React Native for this first version is a huge strategic advantage.
Why? Because you write the code once, and it works for both iOS and Android. This move alone saves you a ton of time and money - two resources you never have enough of. Instead of juggling two separate dev teams and two timelines, you build once and deploy everywhere. This gets your app into real users' hands faster, which is the entire point.

The Art of Ruthless Prioritization
The success of your MVP hinges on one thing: ruthless prioritization. You have to learn the difference between "must-have" features that solve the user's core problem and the "nice-to-have" features that are just noise. This isn't about being lazy; it's about being laser-focused.
We see teams make the mistake of overbuilding all the time. They'll spend weeks building a complex social login system with options for Google, Facebook, and Apple before they even know if people want their app.
The MVP approach flips this on its head. Launch with a simple email and password sign-up. This one feature answers the most critical question: is your core value prop so compelling that someone will spend 30 seconds creating an account? If the answer is no, a dozen social login buttons won't save you.
The goal of an MVP is to maximize learning while minimizing development effort. Every feature has to earn its place by helping you test your main hypothesis about the user's problem. If it doesn't, it gets cut.
Structuring Your Project for Future Growth
Building an MVP fast doesn't mean building something you'll have to throw away. A well-architected React Native project can easily evolve into your full-featured app without a painful rewrite. Just pay attention to a few things from day one.
A sane folder structure is non-negotiable. Keep your components, screens, services, and state management logic in separate, clearly named directories. This simple bit of organization makes it way easier for new developers to get up to speed and for your team to scale without stepping on each other's toes. A practical example: create a /screens directory for top-level views like HomeScreen.js and a /components directory for reusable elements like CustomButton.js.
Choosing the right libraries for navigation and state management is another decision you need to get right early on. These form the backbone of your app.
- Navigation: For getting users from one screen to another, React Navigation is the gold standard. It’s robust, well-documented, and can handle just about any navigation pattern you can dream up.
- State Management: To manage data that needs to be shared across your app, tools like Redux Toolkit or Zustand offer predictable and scalable ways to do it. Starting with a solid state management pattern will save you from a world of hurt later.
If you’re new to the framework, our guide on getting started with React Native is a good place to dig into these foundational concepts.
Avoiding Common Development Traps
Building a React Native MVP is full of traps that can suck up time and money. One of the biggest is premature optimization - don't waste a week perfecting a feature before you've even validated that users want it in the first place. For example, don't spend days building an offline mode before you have data showing that users frequently use your app in areas with poor connectivity.
Another classic mistake is ignoring platform-specific conventions. Sure, React Native lets you share a codebase, but iOS and Android users expect their apps to look and feel different. Use platform-specific components or styles for things like date pickers or alerts. A practical action: use Platform.OS === 'ios' in your code to render an iOS-style ActionSheetIOS and a Material Design dialog for Android. It makes a huge difference in how "native" your app feels.
Finally, don't reinvent the wheel. The React Native ecosystem has thousands of open-source libraries that solve common problems, from handling forms to displaying charts. Using established libraries lets your team focus on building the unique features that actually define your app and deliver value to your users.
Implementing Subscriptions and In-App Payments
If your app runs on subscriptions, the payment system isn't just a feature - it's the engine of your entire business. Getting this right is non-negotiable, but it’s a minefield of complexity most founders underestimate.
You're looking at two fundamental paths for handling in-app purchases (IAP): roll your own custom backend or use a managed service.
Custom Backend vs. Managed Service
Building a custom payment backend gives you absolute control, but it's a monumental task. You become responsible for validating every single receipt from both Apple and Google, managing a tangled web of subscription states (active, expired, grace period, on hold), handling renewals, and securely storing user entitlement data.
This requires hundreds of engineering hours upfront and constant maintenance as the app stores inevitably change their APIs. We’ve seen teams get bogged down for months on this alone.
For the vast majority of startups, especially those building with React Native, a managed service like RevenueCat is the obvious, smarter choice. It abstracts away all that backend chaos, giving you a rock-solid IAP infrastructure from day one. Instead of months of building payment plumbing, you can have it all running in a few days.
The trade-off here is simple: speed vs. control. A custom backend offers total flexibility but at an enormous cost in development and maintenance. A service like RevenueCat accelerates your launch by 90% and frees up your team to build features people will actually pay for.
Integrating Payments with RevenueCat
Getting a service like RevenueCat wired into your React Native app is a surprisingly straightforward process that bridges the gap between your code and the App Store and Play Store payment systems.
Your first step is to define your subscription products. This doesn't happen in your code or in RevenueCat, but directly inside Apple’s App Store Connect and the Google Play Console.
- Product ID: A unique string, like
com.yourapp.monthly_premium. - Name & Description: The user-facing text they'll see on your paywall. For example, "Premium Monthly: Unlock all features."
- Price: The subscription cost.
- Duration: Weekly, monthly, or annual.
Once those are set up in the native stores, you simply connect them to your RevenueCat account. This is what allows the service to listen for purchases and manage subscription statuses on your behalf.
Initiating Purchases and Checking Entitlements
With the react-native-purchases SDK installed in your app, triggering a purchase comes down to calling a single function. You'll fetch the available products (which RevenueCat calls "Offerings") and then present the purchase flow to the user.
Here’s a snapshot of what that looks like in practice:
import Purchases from 'react-native-purchases';
const handlePurchase = async () => {
try {
const offerings = await Purchases.getOfferings();
if (offerings.current && offerings.current.availablePackages.length > 0) {
// Assuming the first package is your primary subscription
const packageToPurchase = offerings.current.availablePackages[0];
const { customerInfo } = await Purchases.purchasePackage(packageToPurchase);
// Check if the user now has an active entitlement
if (customerInfo.entitlements.active.premium) {
// Unlock premium features for the user
console.log("Purchase successful! Unlocking premium access.");
}
}
} catch (e) {
if (!e.userCancelled) {
console.error("Purchase error:", e);
}
}
};
After a purchase, the critical next step is checking the user's entitlements. An entitlement is a concept that represents access rights, like "premium access" or "pro features." This is a brilliant abstraction. It decouples your app’s logic from specific product IDs, which means you can change your pricing or add new plans later without having to ship a new app update. For example, you can A/B test a $9.99/month plan and a $99/year plan, and both can grant the same "premium" entitlement. Your code just checks if (userHasPremium) without caring which product they bought.
You can dive deeper into the nuts and bolts of this setup in our detailed guide on managing in-app purchases for Apple and Android.
While this client-side check is perfect for instantly unlocking features in the UI, it's not the full story. For true security, you need server-side receipt validation. This is where RevenueCat really shines - it handles this automatically, creating a single source of truth for a user's subscription status that can't be spoofed on the device. This guarantees only paying users get access to your premium content.
Your Pre-Launch Checklist for App Store Success
Getting your app approved by Apple and Google is the final hurdle. A rejection at this stage is a total momentum-killer, potentially setting you back days or even weeks. I've seen it happen, and it's brutal.
This isn't just a list of suggestions; this is the field-tested playbook we use to get apps approved on the first try.
Master Your App Store Presentation
Your app store listing is your digital storefront. It’s the first thing potential users see, and in a market this saturated, a bad first impression is a death sentence. A sloppy listing screams "low-quality app," even if your product is brilliant.
The competition is no joke. Roughly 120,000 new apps hit the stores every single month, but only a tiny fraction ever get real traction. You have to stand out from the very first day. If you want to dig deeper, you can read more about how intense app store competition has become and find insights to sharpen your strategy.
Focus on these three assets like your launch depends on them - because it does.
- App Icon: Keep it simple and instantly recognizable. It has to pop. A practical action: open the App Store, search for your main competitor, and place your icon design next to theirs in a screenshot. Does yours stand out or blend in?
- Screenshots: Don't just dump raw UI shots. Tell a story. Use captions to frame each screenshot around a user benefit, not just a feature name. For a budgeting app, a caption should say "See Where Every Dollar Goes Instantly" instead of "Transaction History Screen."
- App Preview Video: This is your best sales tool. A punchy 15-30 second video showing the app in action can massively boost your downloads. Make one. A pro tip: the first 3-5 seconds are critical. Start with the most visually compelling or valuable outcome your app provides.
Nail Your App Store Optimization (ASO)
App Store Optimization (ASO) is basically SEO for your app. It’s how you get found. The goal is simple: rank high for the keywords your target users are actually searching for.
Your app's title is your most valuable ASO real estate. It needs your brand name plus your top one or two keywords. A meditation app shouldn't just be "Calmspace." It should be "Calmspace - Meditation & Sleep."
The description is your sales pitch. The first few sentences are critical because that’s all users see before they have to tap "more." Hook them immediately. An actionable example for a fitness app: Start with "Your personal trainer in your pocket. Get custom workout plans and track your progress to reach your fitness goals faster than ever." Then, weave your primary and secondary keywords into the rest of the text naturally.
I see so many founders treat their app store listing as an afterthought. This is a huge mistake. It’s a core marketing asset. You need to craft the copy and visuals with the same care you'd give a high-stakes landing page. This page directly controls your view-to-download conversion rate.
Prepare for the Review Process
Both Apple and Google have human reviewers who will actually use your app. Your mission is to make their job as easy as possible. A confused or frustrated reviewer is a guaranteed rejection.
This means you need to address the "hidden" requirements that trip up first-time founders all the time.
Here's what you absolutely must have ready:
- A Real Privacy Policy: This isn't optional. You need a public URL for a privacy policy that clearly spells out what data you collect and why. It's a non-negotiable legal and platform requirement.
- A Working Demo Account: If your app has a login, you must provide credentials for a fully-featured demo account. Don’t skimp here. This account needs access to everything, including paid features, so the reviewer can test the entire app. A practical tip: pre-populate the demo account with realistic data so the reviewer can see the app in its best light immediately, without having to create content from scratch.
- Clear Permission Explanations: When your app asks for permissions (location, camera, notifications), you have to tell the user why in the prompt. This is something reviewers actively check. Instead of a generic "Allow notifications?" pop-up, be specific: "Allow notifications so we can let you know when a friend messages you."
Getting these details right shows the review teams you're a professional who has built a transparent, high-quality app. It's this simple diligence that paves the way for a smooth approval, getting you that much closer to launch day.
Post-Launch: Your Analytics and Growth Toolkit
You’ve launched. The app is live. Now the real work begins.
Getting your app into the stores is just the starting gun. Sustainable growth isn’t about downloads; it’s about understanding what users do after they hit install. You need the right tools to translate clicks, taps, and swipes into a clear picture of what’s working and what’s not.
The data here is sobering. The average phone has over 80 apps installed, but over 62% of them are never opened in a given month. At the same time, 49% of people launch their favorite apps more than 11 times a day.
The message is clear: users are ruthless about culling apps that don't deliver immediate and consistent value. Your job is to make sure you’re one of the keepers.
Build Your Product Analytics Foundation
Your first order of business is to set up a real product analytics tool. This is not optional, especially for a subscription app. We’re talking about platforms like Amplitude or Mixpanel. They go way beyond vanity metrics like download counts and show you exactly what people are doing inside your app.
This means you have to track the events that actually drive your business. For a subscription model, your core funnel probably looks something like this:
- Onboarding Completion: Did they finish the setup? This is your first signal of serious intent.
- Core Action Performed: What’s the one thing your app must do? For a fitness app, it’s
workout_completed. Track this like a hawk. - Trial Started: The moment a user signals they're ready to evaluate the paid experience.
- Subscription Purchased: The finish line. This is the conversion that pays the bills.
By tracking these, you can build funnels and instantly see where your experience is leaking users. If 80% of new users start onboarding but only 20% finish, you’ve just found a million-dollar problem to solve. Without this data, you're flying blind. We've actually put together a deep dive on the best analytics tools for mobile apps if you want to compare your options.
The KPIs That Actually Move the Needle
Once you have event tracking in place, you can zero in on the Key Performance Indicators (KPIs) that define the health of your app. Don't drown in data. Focus on these vital signs first.
Day 1/7/30 Retention: What percentage of users come back 1, 7, and 30 days after their first session? A low Day 1 retention rate tells you the first-time experience is broken. An actionable insight: If your Day 1 retention is below 20%, your onboarding process is likely failing to demonstrate value. It's an immediate red flag that needs fixing.
Trial-to-Paid Conversion Rate: Of all the users who start a free trial, how many pull out their credit card? A low number here is a huge red flag. A practical example: If this rate is below 15%, you might be attracting the wrong users with your marketing, or your paywall copy isn't effectively communicating the benefits of upgrading.
Customer Lifetime Value (LTV): How much revenue, on average, will one customer generate before they churn? You have to know your LTV. It's the number that dictates how much you can afford to spend to acquire a customer (your CAC) and still run a profitable business. For instance, if your LTV is $150 and your CAC is $40, you have a healthy business model. If your LTV is $50 and your CAC is $60, you're losing money on every new customer.
Your whole growth strategy is a simple feedback loop. You analyze your KPIs, form a hypothesis ("Our onboarding is too long and confusing"), ship a change to test it, and then measure the impact. This data-driven cycle is what separates apps that hit a growth curve from those that flatline.
Rounding Out Your Stack for Quality and Growth
Beyond product analytics, you need a couple of other tools to keep your app healthy and your marketing spend honest.
Crash and Error Reporting: Tools like Sentry or Bugsnag are your app’s smoke alarm. They catch and report crashes and errors in real-time, often before users even complain. An actionable tip: set up alerts to notify your team via Slack or email for any new or high-frequency crashes. This allows you to respond immediately, protecting your user experience and your App Store ratings.
Mobile Attribution: Once you start paying for ads, you have to know what's working. Is that TikTok campaign driving signups, or is it just burning cash? A mobile attribution platform like AppsFlyer or Adjust connects your marketing campaigns to in-app actions, showing you exactly which channels are delivering valuable, paying customers. It's how you calculate ROI and decide where to double down.
And to make sure you've covered all your bases before you even get to this stage, a good Product Launch Checklist is invaluable for keeping things on track.
Answering Your Lingering App Launch Questions
Even with a playbook, launching an app brings up a lot of questions. I get it. To wrap things up, I want to tackle the most common questions and concerns we hear from founders who are going through this for the first time.
How Long Does This Actually Take?
Founders always want a number. So here it is: a realistic timeline to get a quality subscription MVP from a validated idea to live in the app stores is between 10 to 20 weeks. This isn't a ballpark guess; it's what we see with a focused scope and a professional team.
That timeline usually breaks down like this:
- Validation & Strategy: 1–2 weeks. This is all about intensive customer interviews and market analysis - before a single line of code gets written.
- UI/UX Design: 2–4 weeks. Here's where we turn that validated strategy into tangible wireframes and polished, high-fidelity mockups.
- Core React Native Development: 6–10 weeks. This is the heavy lifting. We’re building out the core features, connecting the backend, and wiring up the payment logic.
- Testing & Submission: 1–4 weeks. This covers everything from internal QA and beta testing with real users to navigating the sometimes-unpredictable app store review process.
The single biggest thing that blows up this timeline? Feature creep. Trying to cram too much into the V1 is the number one reason projects drag on and budgets spiral. For non-technical founders, trying to herd a scattered team of freelancers is a close second, as communication gaps and a lack of specific subscription app experience can easily double these estimates.
Should I Build for iOS First, or Both Platforms?
For almost every subscription startup I've worked with, launching on both iOS and Android from day one is the only move that makes sense. That might sound like it doubles the work, but it absolutely doesn't have to.
By using a modern cross-platform framework like React Native, we build from a single codebase that deploys to both stores. This lets you tap into your entire addressable market from the moment you launch, without doubling your development cost or your timeline.
Some founders get hung up on the old "native-only" performance argument. Years ago, that might have been a valid concern. Today, for the vast majority of apps, a well-built React Native app is virtually indistinguishable from its native equivalent in terms of look, feel, and performance.
The strategic advantage of a unified codebase - faster iteration, a smaller team, and quicker market feedback - far outweighs any minor performance trade-offs for a subscription business. Your speed of learning is your primary competitive edge.
What Are the Biggest Hidden Costs I'm Not Thinking About?
Your initial development budget is just the cost of entry. The real, ongoing costs that tend to catch founders by surprise are what I call the three pillars of a living product: maintenance, iteration, and infrastructure.
- Maintenance: This is the non-negotiable cost of just keeping the lights on. It includes updating your app for new OS versions (like the annual iOS update), patching security vulnerabilities, and keeping all your third-party SDKs from breaking. For example, when iOS 18 is released, your app may crash due to new API requirements. Budgeting for 15-20% of your initial development cost annually for maintenance is a safe rule of thumb.
- Iteration: This is where you actually make more money. Iteration is the constant work of shipping new features, A/B testing your paywall, and optimizing the user experience based on the data you’re collecting. This is how you grow.
- Infrastructure: These are your scaling costs. They include your servers, databases, and mission-critical third-party services like RevenueCat for payments and Amplitude for analytics. As you get more users, these bills will grow. A practical example: a service like RevenueCat might be free for your first $10k in revenue, but will become a recurring cost as your app succeeds.
You have to shift your mindset: engineering isn't a one-time project expense. It's an ongoing operational cost, just like marketing or sales. Your app is a living product that needs continuous investment to stay relevant and grow.
How Do I Know If My App Idea Is Any Good?
An idea's quality has nothing to do with how cool or innovative it sounds. It's measured by one thing: does it solve a painful, recurring problem for a specific group of people who are actually willing to pay for a better way? Validation is how you prove this before you spend a dollar on code.
Your mission is to find hard evidence that the problem is real. Before you even think about building, you need to get on the phone with at least 20-30 potential customers.
And please, don't ask them, "Would you use an app like this?" It's a loaded question that only gets you feel-good, useless answers. You have to be sneakier. Ask them about their life today.
- "Talk to me about how you currently [manage your personal budget]."
- "What's the most frustrating part of that whole process?"
- "What tools have you tried to fix this? Did you ever pay for anything?"
If you can't find anyone who is actively struggling with the problem you want to solve - or worse, they haven’t even bothered to look for a solution - your idea is probably a "vitamin" (a nice-to-have). You're looking for a "painkiller" (a must-have). Only painkillers build successful subscription businesses.
Are you a subscription app founder bottlenecked by engineering? Vermillion is an embedded React Native engineering partner that helps you ship faster. We operate as a dedicated extension of your team, delivering production-grade features on a weekly cadence. Schedule a call with us to see how we can accelerate your growth.
Keep reading
See all →
March 22, 2026
Unlocking Revenue Your Guide to Price Tier Strategy
March 21, 2026
Your Guide to Flawless Stripe Subscription Management

May 14, 2026
Fractional Mobile Engineering vs. Full-Time Hiring in 2026
The mobile engineering talent market has shifted dramatically over the past two years. Budgets are tighter, AI tools have changed what a sin...
March 20, 2026
Recurring Billing With Stripe a Guide for Subscription Apps
Master recurring billing with Stripe. This guide covers everything from setup and server logic to webhooks and churn reduction for subscript...
March 19, 2026
Unlocking Growth with Mobile App Retention Metrics
Discover the mobile app retention metrics that directly fuel MRR growth. This founder's guide offers actionable strategies to track, analyze...