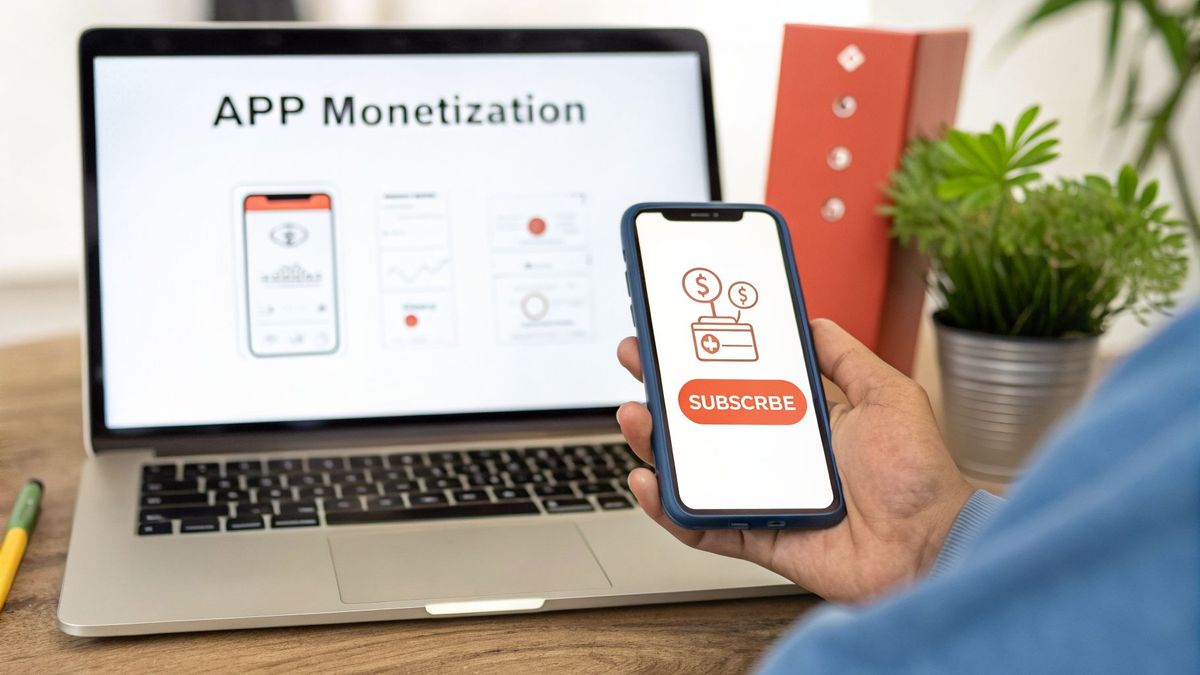
A Founder's Guide to In App Purchases Apple for Subscriptions

For any subscription app founder, understanding Apple’s In-App Purchase system isn't just a technical detail—it's the heart of your entire monetization engine. This system is how your app handles every transaction, from the moment a user taps 'Subscribe' to your server granting them premium access.
Getting this right is the absolute blueprint for generating revenue on iOS.
The Blueprint for Monetizing Your App with Apple Subscriptions
Think of Apple's In-App Purchase (IAP) system as a secure digital handshake between your app, the App Store, and your own server. It’s the official—and only—way Apple lets you sell digital goods and services inside an iOS app, ensuring every single transaction is verified and legitimate.
This process isn't just one thing; it's a few key components working in perfect sync. You'll use App Store Connect to set up your products and prices, while Apple's StoreKit framework gives users the interface to actually make a purchase in your app. Finally, your server steps in to validate each transaction to lock down access and prevent fraud.
Why This System Is Crucial
Let's be blunt: mastering this ecosystem is non-negotiable for any app with a subscription model. The game has changed. The old world of one-time purchases is fading, and recurring revenue now dominates the App Store. In fact, subscriptions now account for a staggering 44% of all Apple App Store revenue.
This trend is only picking up steam. Global iOS subscription revenue is on track to hit an incredible $61 billion by 2025. On top of that, the average revenue per user (ARPU) is climbing 8.5% year-over-year. The data couldn't be clearer—this is the path to sustainable app monetization.
The IAP flow can feel complex at first, but it's built from the ground up for security and reliability. Once you nail it, you can stop worrying about payment processing and focus on what really matters: growing your app.
Key Components You Will Master
Navigating the IAP landscape really comes down to understanding three main pillars. We're going to break down each one to give you a clear roadmap from concept to a successful launch.
- App Store Connect Setup: This is your command center. You'll define your subscription tiers, set prices, create introductory offers, and manage all the product metadata right here.
- StoreKit and Client-Side Logic: This is the code living inside your app. It talks to the App Store to show your products, handles the purchase flow, and gets a transaction "receipt" from Apple after a successful purchase.
- Server-Side Validation: This is the most critical step for security. Your server takes that receipt from the app and verifies it directly with Apple's servers. Only after getting the green light do you unlock premium features for the user.
Thankfully, modern tools have made this whole dance much simpler. What used to be a massive engineering headache is now a manageable—and scalable—part of your business. If you want a broader look at the topic, check out our guide on what in-app purchases are.
Understanding StoreKit and Subscription Models
To make money with your app on iOS, you have to go through Apple. There’s no way around it. That means you need to master the two things that control the flow of cash: Apple’s In-App Purchase (IAP) models and the framework that runs them, StoreKit.
Think of StoreKit as Apple’s official, non-negotiable payment processor. When a user taps "Buy," it’s StoreKit that slides up the payment sheet, securely handles the transaction with their Apple ID, and tells your app whether the payment went through. Apple has since rolled out StoreKit 2, a much-needed update that cleans up a lot of the old complexities.
Choosing the right IAP type is one of the first and most important decisions you’ll make for your app’s entire revenue strategy. Get it right, and you build a sustainable business. Get it wrong, and you're just building a hobby.
The Four Types of In App Purchases
Apple gives you four ways to charge users. While most modern apps live and die by subscriptions, you need to understand the whole landscape to see where you fit.
- Consumable: These are things users buy, use up, and can buy again. The classic example is a "bag of coins" in a game or a "boost" in a dating app. Once it’s used, it’s gone.
- Actionable Insight: Use consumables for high-engagement features. For example, a meditation app could sell a pack of 5 "guided sleep sessions" separate from its main subscription, catering to users who aren't ready to commit.
- Non-Consumable: This is a one-and-done purchase. Users buy it once, and it’s theirs forever. Think "Unlock Pro Features," "Remove Ads," or a pack of permanent photo filters.
- Actionable Insight: Offer a non-consumable "Lifetime" plan as a high-ticket alternative to your subscription. This can be a great way to boost cash flow, especially from your most loyal users.
These first two are foundational, but for building a real, predictable business, the next two are where the action is. Recurring revenue is the name of the game, and you can see how different companies tackle this in our breakdown of successful subscription business model examples.
Subscriptions: The Engine of Modern App Revenue
Let's be clear: subscriptions are the main event. This model is so dominant it now accounts for over 85% of all iOS revenue. The growth is staggering. Across iOS and Google Play, global IAP revenue hit $39.3 billion in Q1 2025 and kept climbing to $40.9 billion in Q2. And the trend is clear: Apple's ecosystem drives significant spending, with iOS users consistently outspending their Android peers.
Apple gives you two flavors of subscriptions:
- Auto-Renewable Subscription: This is the gold standard and what powers apps like Netflix, Spotify, and likely, your own. Users get access for a set period—weekly, monthly, or yearly—and the subscription automatically renews until they cancel. This is the model that builds predictable revenue streams.
- Non-Renewing Subscription: This is more of a niche tool. It grants access for a fixed period and just stops. It's useful for things like a season pass for a sports league or access to an academic course for a single semester. To continue, the user has to manually buy it again.
For almost every subscription founder I work with, Auto-Renewable Subscriptions are the entire business. They’re built for creating long-term customer relationships and stable cash flow. Mastering them isn't optional; it's essential.
To make this model even more powerful, Apple gives you tools like subscription groups. This is just a fancy term for a collection of your subscription plans. For example, a "Pro" tier with monthly and annual options would belong to the same group. This lets users easily upgrade, downgrade, or switch between plans without a headache.
You can also use introductory offers (like a free trial) to get new users in the door and promotional offers to win back people who’ve canceled. All of this is managed right inside App Store Connect.
Alright, you’ve got your monetization strategy sketched out. Now it's time to bring it into the real world inside App Store Connect. This isn't just some settings panel; it's the command center where you’ll define, price, and describe every single in app purchase your users will see.
Getting this part right is non-negotiable. I've seen teams get stalled for weeks because of simple configuration mistakes made right here. Think of this as the hands-on checklist for building out your app's financial backbone correctly on the first try.
The Essential First Steps Before Creating Products
Before you can even think about adding your first subscription, Apple has some housekeeping you need to complete. So many founders get excited and jump straight to creating products, only to hit a brick wall.
Don’t be that founder. You absolutely must have the "Paid Apps" agreement activated. You'll find this in the Agreements, Tax, and Banking section of App Store Connect. If you skip this, the options to create IAPs won't even show up. This step involves giving Apple your legal entity information, bank details for payouts, and tax forms.
Actionable Insight: Get this done the day you enroll in the Apple Developer Program. The approval process can take several days, and it's a common bottleneck that delays launches.
The screenshot below shows the main dashboard. This is your mission control for everything from app builds to analytics and, most importantly, your in app purchases apple.
From here, you’ll dive into the "Apps" section and pick your app to start wiring up its monetization.
Creating Your First Auto-Renewable Subscription
For the vast majority of subscription apps, auto-renewable subscriptions are the entire business model. Let's walk through setting one up. The very first thing you need is a Subscription Group.
A Subscription Group is just a container for different subscription plans that offer a similar level of service. For example, a "Pro" group might hold your "Pro Monthly" and "Pro Annual" options. This structure is what lets users easily switch between plans—upgrading, downgrading, or cross-grading.
Once your group is set up, you can finally create the actual subscription product.
- Navigate to Your App: In App Store Connect, go to
My Appsand select the app you’re setting up. - Go to Subscriptions: Look for
Subscriptionsunder the "Monetization" section in the left-hand menu. - Create a Subscription Group: If this is your first time, you won’t have one. Click the
+icon to create a new group. Give it a straightforward name for your own reference, likePremium_Features. - Create the Subscription: Now, inside that new group, click
Create. This is where you’ll define the specific product a user buys.
Configuring Your Product Details
This is where you tell Apple exactly what the user is buying. Precision is everything, as this info is used by both your app's code and Apple's systems.
- Reference Name: This is just for you. It shows up in App Store Connect and your sales reports. Be descriptive. Something like "Premium Monthly Subscription" works perfectly.
- Product ID: This is the unique identifier your app’s code uses to fetch and display this product. It cannot be changed once created. A messy Product ID is a classic source of technical debt, so use a clean, consistent naming convention like
your_app_name_premium_monthly_v1. - Actionable Insight: Adding
_v1to your Product ID is a smart move. If you ever need to create a new version of the plan with different terms, you can simply create_v2and deprecate the old one, keeping your backend logic clean. - Pricing: You’ll select a price from Apple’s global price tiers. Apple handles all the currency conversions automatically, but you can override prices for specific countries if you have a localized pricing strategy.
- Subscription Duration: Choose the billing cycle, like 1 week, 1 month, or 1 year.
Last but not least, you have to add Localization. This is the customer-facing text—the Display Name and Description—that shows up on your paywall. You must set this for at least one language. Don't rush this; it's part of your sales pitch. A good description might be "Unlock all features, including unlimited projects and cloud sync."
Once you hit save, your in app purchase is officially created. It'll show a "Missing Metadata" warning until all the required fields are filled out, including the information needed for App Store Review. Nailing these foundational steps in App Store Connect is an absolute must for any successful subscription app.
The Technical Flow of an Apple Purchase
With your products set up in App Store Connect, it’s time to get into the weeds. This is where the code meets the cash register. The entire journey—from a user tapping your "Subscribe" button to your server granting them access—follows a very specific, secure path designed by Apple.
You need to understand this flow inside and out. It’s how you protect your revenue, and it’s how you keep your users from getting frustrated. The App Store's reliability is what makes it a global powerhouse. In 2025 alone, the Apple App Store pulled in a staggering $89.3 billion in total revenue, a massive chunk of which came from the very purchase systems we're about to dissect. You can see just how critical this ecosystem is for developers and why getting this right matters.
Initiating a Purchase with StoreKit 2
The whole process kicks off inside your app. First, your app needs to ask Apple’s servers for the list of products you just configured. Using StoreKit 2, Apple’s modern IAP framework, this is a simple asynchronous call. Your app gets back all the product details—localized names, descriptions, and most importantly, the price—and uses that info to build your paywall.
When a user finally decides to buy, your app triggers the purchase. This is where StoreKit 2 completely takes over the screen, showing Apple's native payment sheet. This is a non-negotiable, standardized interface, and for good reason. It builds immense trust because users aren't giving their payment details to you; they're interacting with a familiar, secure system tied directly to their Apple ID. They authenticate with Face ID, Touch ID, or their password, and Apple handles the transaction.
This initial setup for an in-app purchase involves several distinct steps on Apple's side before it ever reaches your app. The infographic below shows the simple process flow for setting up your IAP products in App Store Connect.
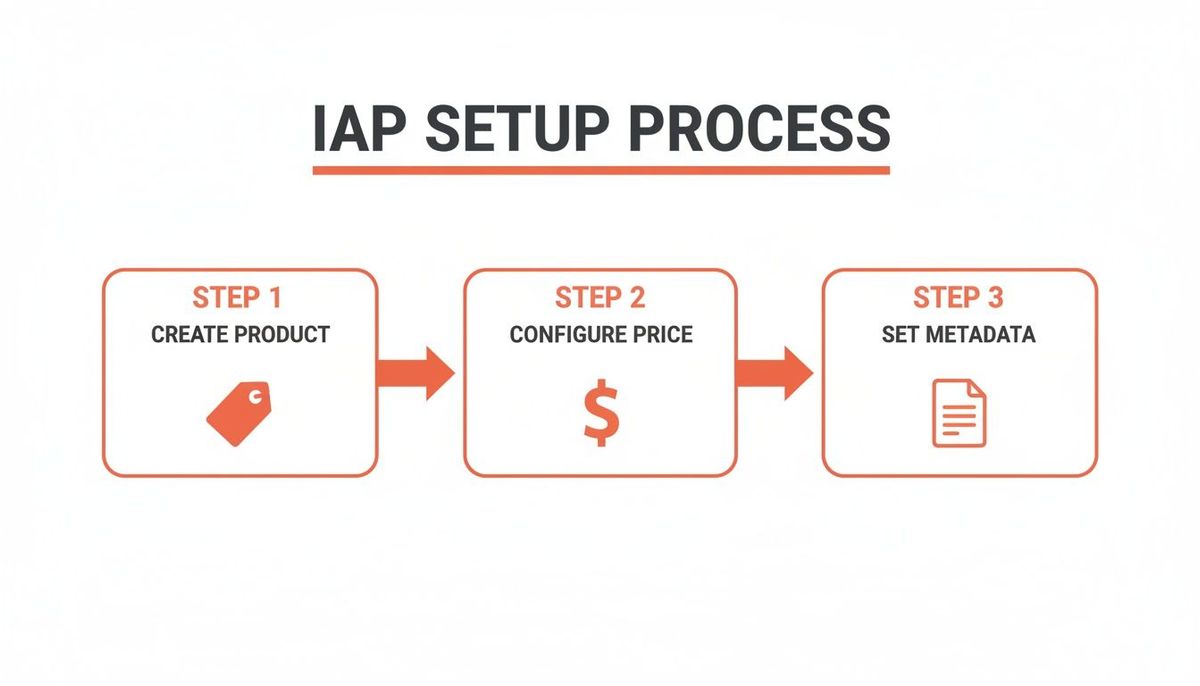
As you can see, you first define what you're selling, then you price it, and finally, you add the descriptive metadata your app will eventually display to the user.
The Critical Role of Transaction Validation
Once the payment goes through successfully, StoreKit 2 gives your app a signed transaction token. Think of this token as a tamper-proof digital receipt, generated and cryptographically signed by Apple. Now comes the most important part of the entire flow: you have to validate that receipt. You must verify it's legitimate before you unlock a single premium feature.
You’ve got two ways to do this:
- Client-Side Validation: The app verifies the receipt on its own. It's quick and easy to code, but it is dangerously insecure. A determined user can patch your app and bypass this check, giving themselves free access for life.
- Server-Side Validation: This is the only way to do it right. Your app sends the transaction token to your own server, which then double-checks its authenticity directly with Apple's servers.
Never, ever trust the client. Always validate purchase tokens on your server. Relying on client-side validation is like leaving your front door unlocked and hoping no one walks in.
Here’s how the secure, server-side flow actually works:
- Your app receives the transaction token from StoreKit 2.
- The app immediately sends this token to your backend server.
- Your server takes that token and forwards it to Apple's
verifyReceiptendpoint or, even better, uses the newer App Store Server API. - Apple’s server checks the token, validates it, and sends back a definitive JSON response detailing the purchase.
- Your server parses that response, updates the user's account in your database (e.g., sets
isPrototrue), and sends a confirmation back down to the app. - The app gets the green light from your server and finally unlocks the premium features.
Managing Subscriptions with Server Notifications
For subscription apps, the initial purchase is just the start of the relationship. You need to know when a subscription renews, when a user churns, or when their credit card fails. This is where App Store Server Notifications are indispensable.
These are just webhooks—real-time pings—that Apple sends to your server whenever a key event happens in a subscription's lifecycle. You just need to set up a URL endpoint in App Store Connect, and Apple will start sending you updates for events like:
- `DID_RENEW`: A subscription successfully renewed. Time to extend their access.
- `EXPIRED`: A subscription ended, either because the user canceled or billing failed too many times.
- `DID_FAIL_TO_RENEW`: A renewal attempt failed, usually due to an expired card. This is your cue to act.
- `REFUND`: A user got their money back for a purchase. You need to revoke their access immediately.
Actionable Insight: Properly handling these notifications is non-negotiable for keeping an accurate record of who gets access to what. For instance, a DID_FAIL_TO_RENEW notification is a golden opportunity to trigger a dunning email, prompting the user to update their payment info and saving you from involuntary churn. This real-time data flow ensures your user entitlements always match their actual subscription status on Apple's end.
Integrating IAP in React Native with Modern Tools
Building your own subscription infrastructure from scratch is an absolute engineering nightmare. Seriously.
Managing raw StoreKit code, validating receipts with Apple's servers, and tracking who has access to what is a full-time job. It’s time you should be spending on features your users will actually love, not on reinventing payment plumbing. For any modern team, especially one using React Native, this is a solved problem.
The key is to use a subscription-as-a-service platform. These tools wrap up the brutal complexity of Apple’s entire purchase system and turn what would be a months-long project into a few lines of code.
Why You Should Use a Tool Like RevenueCat
For React Native developers, a platform like **RevenueCat** is practically non-negotiable. Think of it as a clean, reliable layer that sits between your app and the native StoreKit framework. It gives you one unified API for both iOS and Android, meaning you write your purchase logic once and it just works.
Instead of fighting with platform-specific code for in app purchases apple, you get a simple SDK that manages the whole lifecycle. RevenueCat just handles it:
- Fetching your products and prices from App Store Connect.
- Kicking off the purchase flow with a single function call.
- Securely validating every receipt on its own servers.
- Keeping a perfect, real-time record of every user's subscription status.
This approach completely changes the development timeline. A process that used to be complex and riddled with potential errors becomes simple, freeing up your engineering team to focus on your core app.
By handling all the backend logic, RevenueCat frees your team from the tedious, painful work of server-side receipt validation and state management. It becomes the single source of truth for user entitlements, so your app always knows exactly who should have premium access.
For teams looking to get to market faster, we’ve put together detailed guides on how Vermillion provides expert RevenueCat integration services.
A Practical Integration Pattern
Getting RevenueCat into a React Native app is surprisingly straightforward. Once you’ve installed the react-native-purchases SDK, you just initialize it with your API key. From there, the logic for a typical paywall breaks down into three simple steps.
- Fetch Offerings: Your app asks RevenueCat for the "Offerings" you’ve set up. The SDK automatically pulls the correct product metadata and pricing from Apple for that specific user.
- Make a Purchase: A user taps your "Subscribe" button, and you call the
purchasePackage()function. RevenueCat immediately presents the native iOS purchase sheet, and the user finishes the transaction with their Apple ID. - Check Entitlements: The moment the purchase succeeds, you can check the user's
purchaserInfo. RevenueCat’s backend will have already validated the receipt with Apple's servers and updated the user's "entitlements," instantly unlocking their premium access.
Actionable Insight: This simple pattern removes almost all the backend complexity from your plate. For example, instead of writing your own server endpoint to talk to Apple, you just call Purchases.purchasePackage(myPackage) in your app. RevenueCat handles the rest. And while Apple’s native tools are one option, many other modern tools exist for handling payments. For a different take on mobile monetization, this Stripe React Native: A Practical Guide to Mobile Payments is a great resource.
Layering Paywall Experiments with Superwall
Once your subscription logic is solid, the next job is to optimize your paywall for conversions. This is where a tool like **Superwall** shines.
Superwall layers directly on top of RevenueCat, giving your marketing and product teams the power to run A/B tests on your paywall—all without shipping a new app build.
You can remotely change headlines, button copy, price displays, and even completely different screen layouts.
Practical Example: You could test a paywall with a bold "7-Day Free Trial" headline against one that emphasizes "Unlock All Features." Superwall tracks the conversion rate for both, telling you exactly which message resonates most with your users. The ability to iterate on your monetization strategy this quickly is a game-changer. It empowers the business side of your team to run experiments and find what really works, without ever creating an engineering bottleneck.
This combination—RevenueCat for the infrastructure and Superwall for optimization—is a potent stack for any subscription app looking to grow fast.
Sandbox Testing and Avoiding Common Pitfalls
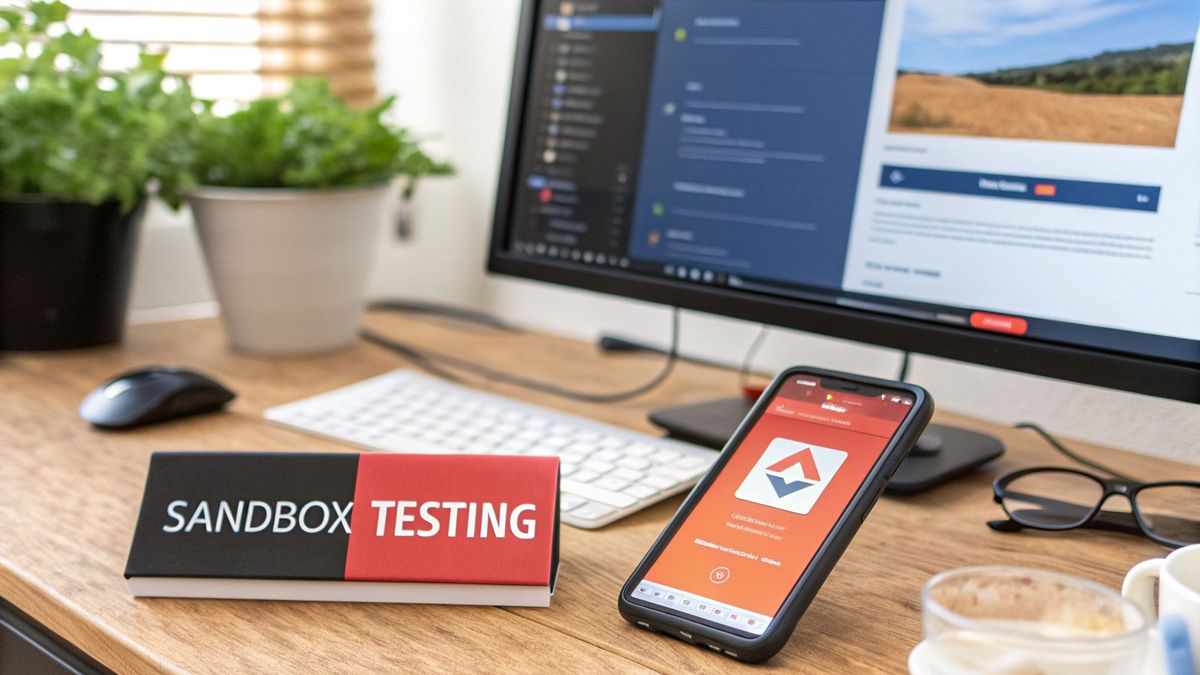
Alright, let's talk about testing. This is where all the theory about in app purchases hits the pavement, and frankly, it’s a phase that trips up a shocking number of developers. This isn't just about seeing if a "buy" button works. You need to simulate the entire subscription lifecycle—from trial to renewal to cancellation—to make sure your app doesn't break under real-world conditions.
The cornerstone of this whole process is Apple’s Sandbox environment. Think of it as a complete clone of the App Store where you can make endless fake purchases with special test accounts. No real money changes hands, making it the essential proving ground for your app's monetization before you go live.
Setting Up Your Sandbox Test Environment
First things first, you need to create Sandbox Tester accounts. You’ll find this inside App Store Connect under the Users and Access section. These are special Apple IDs that only exist for testing IAPs.
Each tester needs a unique email address that isn't already tied to a real Apple ID. Here’s a pro tip: use email sub-addressing if your provider supports it, like your.email+test1@gmail.com and your.email+test2@gmail.com. This lets you create dozens of "unique" accounts that all forward to your main inbox.
Once your Sandbox account is ready, sign out of your real Apple ID on your test device. You do this under Settings > Media & Purchases. Then, trigger a purchase inside your app and sign in with your Sandbox credentials when the system prompt appears. Crucially, never sign into the main iOS Settings with a Sandbox account. It will cause all sorts of headaches.
One of the best—and most critical—features of the Sandbox is its accelerated time. A 1-month subscription renews every 5 minutes, and a 1-year plan renews every hour. This is a game-changer. It lets you test the full customer journey—trials, multiple renewals, billing issues, and cancellations—all in a single afternoon.
Most Common IAP Testing Pitfalls
Navigating the Sandbox can feel like walking through a minefield. I've seen developers lose days chasing down the same few frustrating issues. Here’s a checklist of the most common traps and how to get out of them.
- Using a Real Apple ID: Trying to buy something in a development build with your normal Apple ID will always fail. You must use a dedicated Sandbox Tester account for every single test. No exceptions.
- Product Information Delays: Just created a new IAP in App Store Connect? It can take several hours—sometimes longer—for it to show up via the StoreKit API. If your products aren't loading and your code seems right, the best first step is often to just wait.
- Testing on iOS Simulators: While it's tempting, testing in app purchases apple on a Simulator is notoriously flaky, especially with frameworks like Expo. You’ll run into cryptic authentication errors that send you on a wild goose chase. For reliable results, always test on a physical device.
- Incorrect App Build: You can't test IAPs using the version of your app you downloaded from the App Store or even TestFlight. You have to run a development build directly from Xcode (or your dev environment of choice) onto your physical device.
- Forgetting Agreements: This one is a classic. If you haven't filled out the "Paid Apps Agreement" in App Store Connect, your IAPs simply won't work. This is the legal and financial paperwork that allows Apple to process payments for you. Go double-check that it's signed and active.
By methodically checking these points, you can sidestep the most common roadblocks and build subscription logic that's ready for prime time. Testing on a physical device with a proper Sandbox account is the gold standard for a reason—it’s the only way to get a true preview of your customer's experience.
###
Frequently Asked Questions About Apple IAP
Even after you get the basics down, a few recurring questions always pop up when implementing in-app purchases. Here are the answers to the ones we hear most often, designed to save you from some common headaches down the road.
What Is the Difference Between StoreKit and StoreKit 2?
Think of StoreKit as the original, manual-transmission version and StoreKit 2 as the modern automatic. StoreKit 2, which landed with iOS 15, is Apple’s new standard. It's built for modern Swift with async/await, gives you transaction info right in the app, and handles syncing purchases across a user’s devices for you.
The original StoreKit is much clunkier. It relies on older delegate patterns and forces you to do more heavy lifting with server-side receipt validation. For any new app, especially one using React Native wrappers, StoreKit 2 is the clear choice. It's just simpler and more powerful.
Can I Change the Price of an Existing Subscription?
Yes, but Apple has some very specific rules here. You can increase the price for your existing subscribers, but you can't do it quietly. Apple will notify them, and they have to explicitly agree to the new price. If they ignore the notification or decline, their subscription will simply expire at the end of their current billing cycle.
Actionable Insight: You can’t decrease the price for existing subscribers. To get a lower price, they have to cancel and then resubscribe. You can, however, change the price for new subscribers anytime you want in App Store Connect without any issue. A common strategy is to "grandfather" old users at their original price while increasing it for all new signups.
What Happens If My Server Is Down During a Purchase?
This is a critical failure point you absolutely must plan for. If your server is offline when the app tries to validate a receipt, the purchase has to fail gracefully. Don't grant access. The user should be informed that something went wrong so they can try again later.
Practical Example: The app should show an alert like, "Your purchase was successful, but we couldn't verify it with our server. Please tap 'Restore Purchases' in settings to activate your subscription."
For the server-to-server notifications that RevenueCat and others rely on, Apple's servers will retry sending them for up to 60 days. This is why a resilient server with a proper queuing system is non-negotiable—it ensures you can process those notifications reliably, even if you have temporary downtime.
If you're looking for an embedded engineering partner to accelerate your app's growth, Vermillion specializes in shipping monetization features for React Native subscription apps. We help teams like yours move faster and ship weekly without the engineering bottleneck. Find out how we can help at https://vermillion.agency.