How to Use MapView to Build Location-Aware Apps

Before you can bring a map to life in your app, you have to make a foundational decision that will shape your user's entire experience. Integrating a map isn't just about dropping a component into your code; it's a strategic choice that connects your digital product to the physical world. Getting this first part right is everything.
The process starts with picking a map provider. This choice between industry giants—Google Maps and Apple Maps—will ripple through your app's functionality, its reach, and even its look and feel. This isn't just a cosmetic decision. You're tapping into a massive ecosystem of location data, user habits, and platform expectations.
Choosing Your Map Provider
Your first move is selecting a provider within the react-native-maps library. Each one comes with a specific set of trade-offs, and the right answer almost always comes down to your target audience.
If your user base lives primarily on iOS, leaning into Apple Maps is a no-brainer. It delivers a seamless, native experience that feels right at home on an iPhone, and you won't have to worry about setting up extra billing. It just works.
On the other hand, if your app is built for Android or a cross-platform audience, Google Maps is the default choice for a reason. Its universal familiarity and incredibly deep feature set make it a rock-solid option for nearly any scenario. As of Q1 2025, Google Maps has a staggering 2.2 billion monthly active users around the globe, which speaks volumes about its reach and the trust users place in it.
This decision tree gives you a simple way to think about it.

As you can see, an iOS-first strategy aligns perfectly with Apple Maps' native integration. For pretty much everyone else, Google Maps is the way to go.
Google Maps vs Apple Maps A Strategic Choice
For founders and product leaders, this decision goes beyond the code. It’s about aligning your tech stack with your business goals. Here's a quick breakdown to help you weigh the strategic implications of choosing between Google Maps and Apple Maps for your project.
| Feature | Google Maps Provider | Apple Maps Provider |
|---|---|---|
| **Platform Reach** | Dominant on Android and web. The default choice for cross-platform apps, ensuring a consistent experience everywhere. | The default, native experience on iOS, iPadOS, and macOS. Offers seamless integration for users within the Apple ecosystem. |
| **Customization** | Offers extensive map styling options through Google Cloud Platform, allowing for highly branded and unique map designs. | Provides more limited styling capabilities. The focus is on a clean, consistent look that aligns with Apple's design language. |
| **Data & Features** | Unmatched repository of business listings, Street View, and real-time traffic data. Richer points-of-interest (POI) data. | Strong on core navigation and mapping features. Data quality has improved significantly but can still lag Google in some areas. |
| **Pricing & Billing** | Operates on a pay-as-you-go model. Requires a credit card on file and careful API key management to control costs. | Generally free for native iOS applications, with no complex billing setup required for standard use. |
| **User Experience** | Familiar and trusted by billions. Users know exactly what to expect, which can reduce friction. | Feels deeply integrated and performs exceptionally well on Apple devices. The "it just works" experience for iPhone users. |
Ultimately, the choice hinges on who you're building for. An Android-heavy or global user base points toward Google Maps, while an exclusive focus on the Apple ecosystem makes Apple Maps an easy and cost-effective pick.
Initial Setup and Configuration
Once you've landed on a provider, it's time to get your hands dirty by installing the react-native-maps library and setting up your API keys. This library is the essential bridge that lets your React Native code talk to the powerful native mapping services baked into iOS and Android. If you want to dig deeper into why this hybrid approach is so effective, take a look at our guide on how React Native can speed up mobile app development.
A common mistake I see teams make is hardcoding API keys directly into the app's source code. Never do this. Always use environment variables to store sensitive keys. It keeps them out of your Git history and protects your app from being hijacked, saving you from terrifyingly large, unexpected bills.
Securing your API keys properly is non-negotiable. For Android, you’ll add your key to the AndroidManifest.xml file. On iOS, it gets configured in the AppDelegate. Taking a few extra minutes to get these configs right from the start will save you from common headaches—like the dreaded blank map on one platform—and ensure your launch is smooth and secure.
Breathing Life into Your Map with Markers
Okay, you’ve got your setup handled and a map component rendering on the screen. Right now, it's just a blank canvas. The real fun starts when you begin populating it with data, turning a simple map into an interactive story. This is where you really start to see what MapView can do.
Your first job is to give the map a starting point. By setting the initialRegion prop, you control the camera's initial position and zoom level. This is critical for making sure users see the most relevant area—like their current city or a specific event location—the moment the map loads. Think of it as setting the opening scene.
This initial view is defined by a coordinate and how much area you want to show around it. You'll specify a central latitude and longitude, plus the latitudeDelta and longitudeDelta to define the zoom. Smaller delta values give you a tighter, more zoomed-in view, which is perfect for pinpointing a single address.
Placing Your First Pin
With the map centered, it’s time to add markers. Markers are the visual anchors that represent key locations—a user's home, a list of nearby coffee shops, or a delivery driver's current position. Without them, your map is just geography; with them, it becomes a dynamic, useful interface.
Rendering a marker is surprisingly straightforward. You just drop a <Marker /> component inside your <MapView /> and give it a coordinate prop with the precise latitude and longitude where you want the pin to appear.
Here’s a practical example you might see in a ride-sharing app, showing the driver's location:
<MapView
  initialRegion={{
    latitude: 34.052235,
    longitude: -118.243683,
    latitudeDelta: 0.0922,
    longitudeDelta: 0.0421,
  }}
  style={{ flex: 1 }}
>
  <Marker
    coordinate={{ latitude: 34.052235, longitude: -118.243683 }}
    title={"Your Ride"}
    description={"Honda Civic - Arriving in 2 minutes"}
  />
</MapView>
This little snippet doesn't just render a map centered on downtown Los Angeles; it also places a single, informative marker right in the middle.
Creating Interactive Callouts
A simple pin is good, but an interactive one is way better. When a user taps a marker, you can display a callout—that little bubble that pops up with more information or even clickable buttons. This is absolutely crucial for creating an engaging user experience.
Imagine a local services app. Instead of just showing pins for local businesses, each marker could have a callout with the provider's name, their rating, and a "Book Now" button.
The real power of MapView isn't just showing locations; it's in creating a direct link between a physical place and a digital action. A well-designed callout turns a passive map viewer into an active, engaged user who can make a purchase, book a reservation, or get directions without ever leaving the map.
To pull this off, you nest a <Callout /> component right inside your <Marker />. Here's an actionable example for a restaurant app, allowing users to book a table directly from the map:
<Marker
  coordinate={{ latitude: 40.712776, longitude: -74.005974 }}
  title={"Gourmet Bistro"}
>
  <Callout onPress={() => this.handleBooking('Gourmet Bistro')}>
    <View>
      <Text>Gourmet Bistro</Text>
      <Text>Rating: 4.5 Stars</Text>
      <Button title="Book a Table" />
    </View>
  </Callout>
</Marker>
By handling the onPress event on a button inside a callout, you connect the map directly to your app's core functionality, driving conversions and helping users complete their tasks.
Scaling Your Map for Performance and Engagement
As your app gains traction, a map cluttered with hundreds—or even thousands—of pins quickly becomes a performance nightmare. It's not just a technical problem; a slow, laggy map is a direct hit to your user experience. To keep your app snappy and useful, you need to think about scaling your MapView from day one.

The single best tool in our arsenal for handling dense location data is marker clustering. Instead of trying to render every single pin individually, this technique groups nearby markers into a single, dynamic cluster. This cluster usually shows a count of the markers it represents, giving users a clean, high-level view without bogging down the device's CPU.
The performance gains are dramatic, and it transforms a messy, unusable interface into something clean and intuitive. As a user zooms in, the clusters intelligently break apart, revealing the individual markers hidden within.
Transforming Clutter with Marker Clustering
Imagine building a real estate app. If you tried to display every listing in a city like New York, you’d just create a sea of pins. The map would be completely unusable. Marker clustering fixes this by showing a few numbered circles at a city-wide view. As a user zooms into a specific neighborhood, those clusters break apart to reveal smaller groups or individual listings.
To pull this off, you’ll need a wrapper around your <MapView /> component. Libraries like react-native-map-clustering handle all the tricky logic for you, making it surprisingly easy to implement. You just replace <MapView /> with <ClusteringMapView> and let the library take care of the grouping and rendering.
A common pitfall here is the temptation to build a custom clustering solution from scratch. While it feels like you'll get more control, it's an incredibly complex problem that can introduce subtle bugs. A well-maintained library will save you a ton of development time and headaches.
Designing a Branded Map Experience
Beyond pure performance, MapView is also a great place to reinforce your brand's visual identity. A generic, default map can feel out of place in an otherwise thoughtfully designed app. That’s where the customMapStyle prop comes in. It lets you completely transform the map's look to match your brand's aesthetic.
This prop takes a JSON array that defines styles for literally every element on the map—from roads and parks to water and building labels. You can:
- Adjust Colors: Tweak the hue of land, water, and roads to match your brand's palette.
- Simplify the View: Hide unnecessary labels or features to cut down on visual noise.
- Create a Theme: Implement a "dark mode" or a minimalist, grayscale map style that feels unique to your app.
Tools like the Google Maps Platform Styling Wizard or Snazzy Maps give you a visual interface to create these styles. Once you're happy, you can export the JSON and drop it right into your project.
Drawing Shapes for Geofencing
Finally, you can add another layer of interactivity by drawing shapes like circles and polygons directly on your map. This is the foundation of geofencing—creating virtual boundaries around real-world locations.
For a retail app, you could draw a circle around each of your store locations. When a user's device enters that circle, your app could trigger a push notification about a local sale. This is a perfect example of connecting a technical feature to a real business outcome, driving foot traffic and sales. Here's a practical code snippet for drawing a geofence circle:
<MapView style={{ flex: 1 }}>
  <Circle
    center={{ latitude: 37.78825, longitude: -122.4324 }}
    radius={500} // Radius in meters
    strokeColor="rgba(255,0,0,0.5)"
    fillColor="rgba(255,0,0,0.2)"
  />
</MapView>
This technique is especially relevant for engaging the millions of iPhone owners who use Apple Maps, a platform with a rapidly growing user base. In 2024, Apple Maps commanded 20-25% of the global mapping share, with projections suggesting its user base could reach 1 billion by 2026. Discover more insights about Apple's mapping platform on electroiq.com.
These advanced techniques elevate your app from a simple location display to a powerful, performant, and deeply engaging tool. Efficiently handling numerous data points is crucial, and you can learn more by checking out our guide on optimizing app performance for various network conditions.
Connecting MapView to Your Core Business Logic
A map on its own is just a pretty picture. It only becomes a serious business tool when you wire it up to your app's core logic and backend systems. The real power of MapView isn't just dropping pins on a map; it's creating a dynamic, interactive surface that pulls in live data and responds to what your users are doing.
The most common starting point? Fetching location data from your own API. Instead of hardcoding a bunch of coordinates (which you should almost never do), your app makes a network call to your server. The server then sends back a fresh list of locations—maybe it's available rental properties, nearby drivers, or points of interest. That data immediately populates the map with markers that are always up-to-date.
Think about a travel app. You don’t want to load every single tourist attraction in the world the second the user opens the map. That would be a disaster for performance. A much smarter way is to use the onRegionChangeComplete event. This event fires after the user stops panning or zooming. You can grab the new map boundaries from the event, send them to your API, and fetch only the data relevant to what the user is actually looking at. It’s an incredibly efficient pattern that keeps the app feeling snappy.
From Data Points to Business Insights
Beyond just showing stuff, MapView is a goldmine for understanding what your users care about. Every tap on a marker, every zoom into a specific neighborhood—it's all product analytics gold. This data tells you a story about user intent.
These insights are where you find your optimization and monetization opportunities. For example, if you see that users in a particular part of town are constantly searching for "coffee shops," that's a signal. You could:
- Offer premium listings to local cafes, letting them pay to stand out with a custom icon.
- Run location-based promotions by partnering with businesses in those high-traffic map areas.
- Double down on your data quality by focusing your efforts on enriching the POI data in the most-viewed regions.
Every map interaction is a clue. For a great real-world example of how this plays out in business operations, check out how companies use this for things like Geofencing in Fleet Management.
Powering Dynamic Maps with a Solid Backend
To feed your map all this dynamic data, you need a backend that can keep up. Your API has to be built to handle geospatial queries efficiently—things like "find all restaurants within a 2-mile radius of the user." This is where a well-designed API for microservices can really pay off, letting you dedicate a specific service just to handle the heavy lifting of location queries.
A map's value is directly tied to the freshness and relevance of its data. A seamless connection to your backend ensures that what the user sees on the map accurately reflects the real world, building trust and driving engagement.
When you integrate with a powerhouse like the Google Maps Platform, you're tapping into an ecosystem users already know. We're talking about coverage in over 220 countries, 200 million business listings, and a platform that handles 5 billion searches every single day. That level of familiarity and trust is a massive advantage when you layer your own business logic on top.
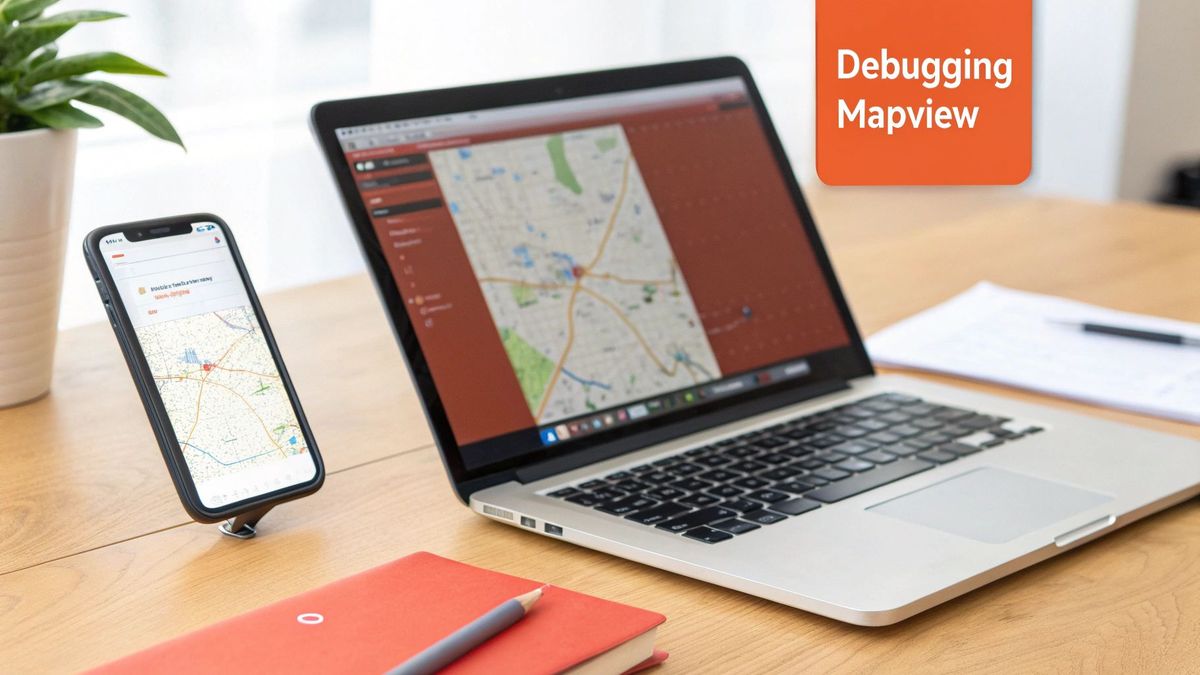
Wrestling with Common MapView Problems
Sooner or later, every developer hits a wall with maps. What seems like a straightforward feature can quickly spiral into a frustrating bug hunt, eating up hours of productivity. Getting ahead of the most common snags is the first step to saving your sanity.
One of the classics, especially for teams just starting with react-native-maps, is the infamous blank map screen on Android. Nine times out of ten, this points straight to a bungled Google Maps API key. Before you do anything else, triple-check that the key is sitting correctly in your AndroidManifest.xml and that you've actually enabled the Google Maps SDK for Android in your Google Cloud project.
Another frequent headache? Platform-specific rendering quirks. You’ll spend hours getting a custom marker to look pixel-perfect on iOS, only to find it's a distorted, clipped mess on Android. This usually crops up when using complex custom views for markers. The secret is to keep those marker views as simple as possible and test on both platforms constantly, not just at the end.
Diagnosing Performance Bottlenecks
Once you start piling on features and data, performance can take a nosedive. If your map gets sluggish and choppy when users pan or zoom—especially with a ton of markers—you've got a performance bottleneck. The root cause isn't always obvious and demands a methodical approach.
When you're facing a complex or recurring bug in your MapView, a structured problem-solving framework is a lifesaver. A fantastic tool for this is the 5 Whys Method to fix root causes, which forces you to dig past the surface-level symptoms to find what's really broken. Is the map slow because you're rendering 5,000 markers at once, or is a bad data-fetching loop firing on every tiny region change?
Here’s a quick debugging trick I use all the time: temporarily swap your fancy custom markers with basic, default pins. If the performance instantly snaps back, you've found your culprit—it's the rendering logic in your custom component. This simple test can save you from chasing ghosts.
Handling Permissions and State Like a Pro
Finally, a huge source of bugs and terrible user experiences comes from sloppy handling of location permissions. An app that crashes or just shows an empty map because the user denied location access is the hallmark of brittle code.
Your app should always check the permission status before it tries to grab the user's location. Design a clear, friendly flow for requesting permission, and have a graceful fallback ready if they say no. A practical example is to display a search bar. If permissions are denied, the user can still engage with the map by manually searching for a location, ensuring the feature remains useful. It's this proactive error handling and thoughtful state management that separates a polished, professional app from a frustrating one.
Commonly Asked Questions About MapView
When you start working with MapView, you'll inevitably run into the same handful of questions that trip up almost every developer. Knowing the answers ahead of time can save you hours of frustration. Let's walk through some of the most common ones I've seen teams struggle with.
The first big one is almost always about security: "How should I handle my API keys?" The answer is simple and non-negotiable: never hardcode them.
Your best bet is to use environment variables, typically managed with a .env file. This keeps your keys out of your Git repository, which is a massive security win. On Android, you'll reference your key in the AndroidManifest.xml, and for iOS, it's done in the AppDelegate.
Platform Choices and Customization
Another frequent point of confusion is map providers and billing. "Can I just use Apple Maps on iOS to dodge Google's billing?" Yes, you absolutely can. By setting the prop provider='apple', your iOS app will use the native Apple Maps, which doesn't require separate billing for standard usage.
But remember, this only works for iOS. On Android, you're tied to the Google Maps SDK, which means you need a Google Cloud project with billing enabled. There's no way around that.
The most effective solution for displaying a high volume of data points is marker clustering. This technique groups nearby markers into a single cluster icon, dramatically improving performance and keeping the UI clean. As a user zooms in, the clusters intelligently break apart to reveal individual markers.
Finally, everyone wants to know how to make the map look like their app. "How do I customize the map style to match my brand?" This is where the customMapStyle prop comes in.
It takes a JSON array that gives you granular control over the look and feel of every map element, from roads and parks to bodies of water. You can use tools like the Google Maps Platform Styling Wizard to create a theme visually, then just export the JSON and plug it into your app. It’s a powerful way to create a completely seamless and branded user experience.
Building a high-performance, revenue-generating mobile app requires more than just technical skill—it demands a strategic partner aligned with your business goals. Vermillion specializes in shipping production-ready React Native apps that prove traction and ROI fast. Discover how our performance-based model can accelerate your growth by visiting us at https://vermillion.agency.